Update:
In regards to the situation with my team member leaving campus, discussing with my facilitator came to the agreement that I would complete the production of my two characters. If I have any time thereafter, I would attempt to produce a third character.
Texturing (part 2):
After being unable to complete the UV unwrap at home, trying to do so on campus proved just as difficult. Unfortunately my scene files weren’t allowing me to produce smoothed out UV maps, and after consulting with my facilitator we’ve deduced that it was likely an issue with the UV Set Editor.
Another issue I was having was that I couldn’t use the middle mouse to click and drag in the Hypershade. This meant that I couldn’t try to set up a lambert aqua base with a shiny blinn shader for the decals and painted textures.


Texturing onto the UV maps wasn’t very difficult, as I was able to reuse elements from the digital orthogonal model sheets and adjust them to fit the maps. In hindsight, however, I did make some foolish unwrap decisions that made the texturing harder on myself.


One of the hardest parts in the texturing was getting the rings around the Quetzalcoatl’s wrists to line up properly at the ends. This was made difficult due to the fact that the UV map for the arm caused the wrist to become thinner on the inside of the arm. This would have been much easier to align had the wrist been laid out as flat squares.
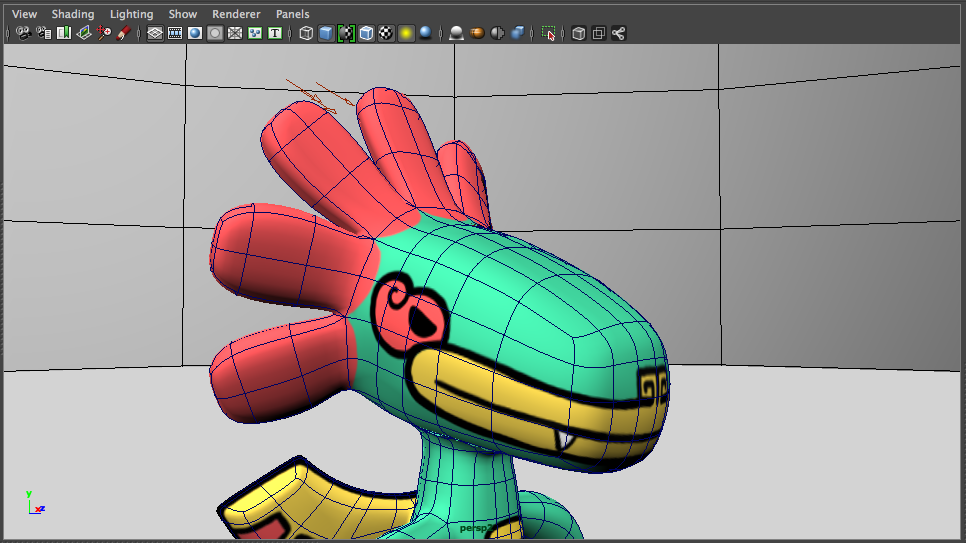
A similar issue occured with the Quetzalcoatl’s face, with the mouth texture having to be warped to look right on the model itself.

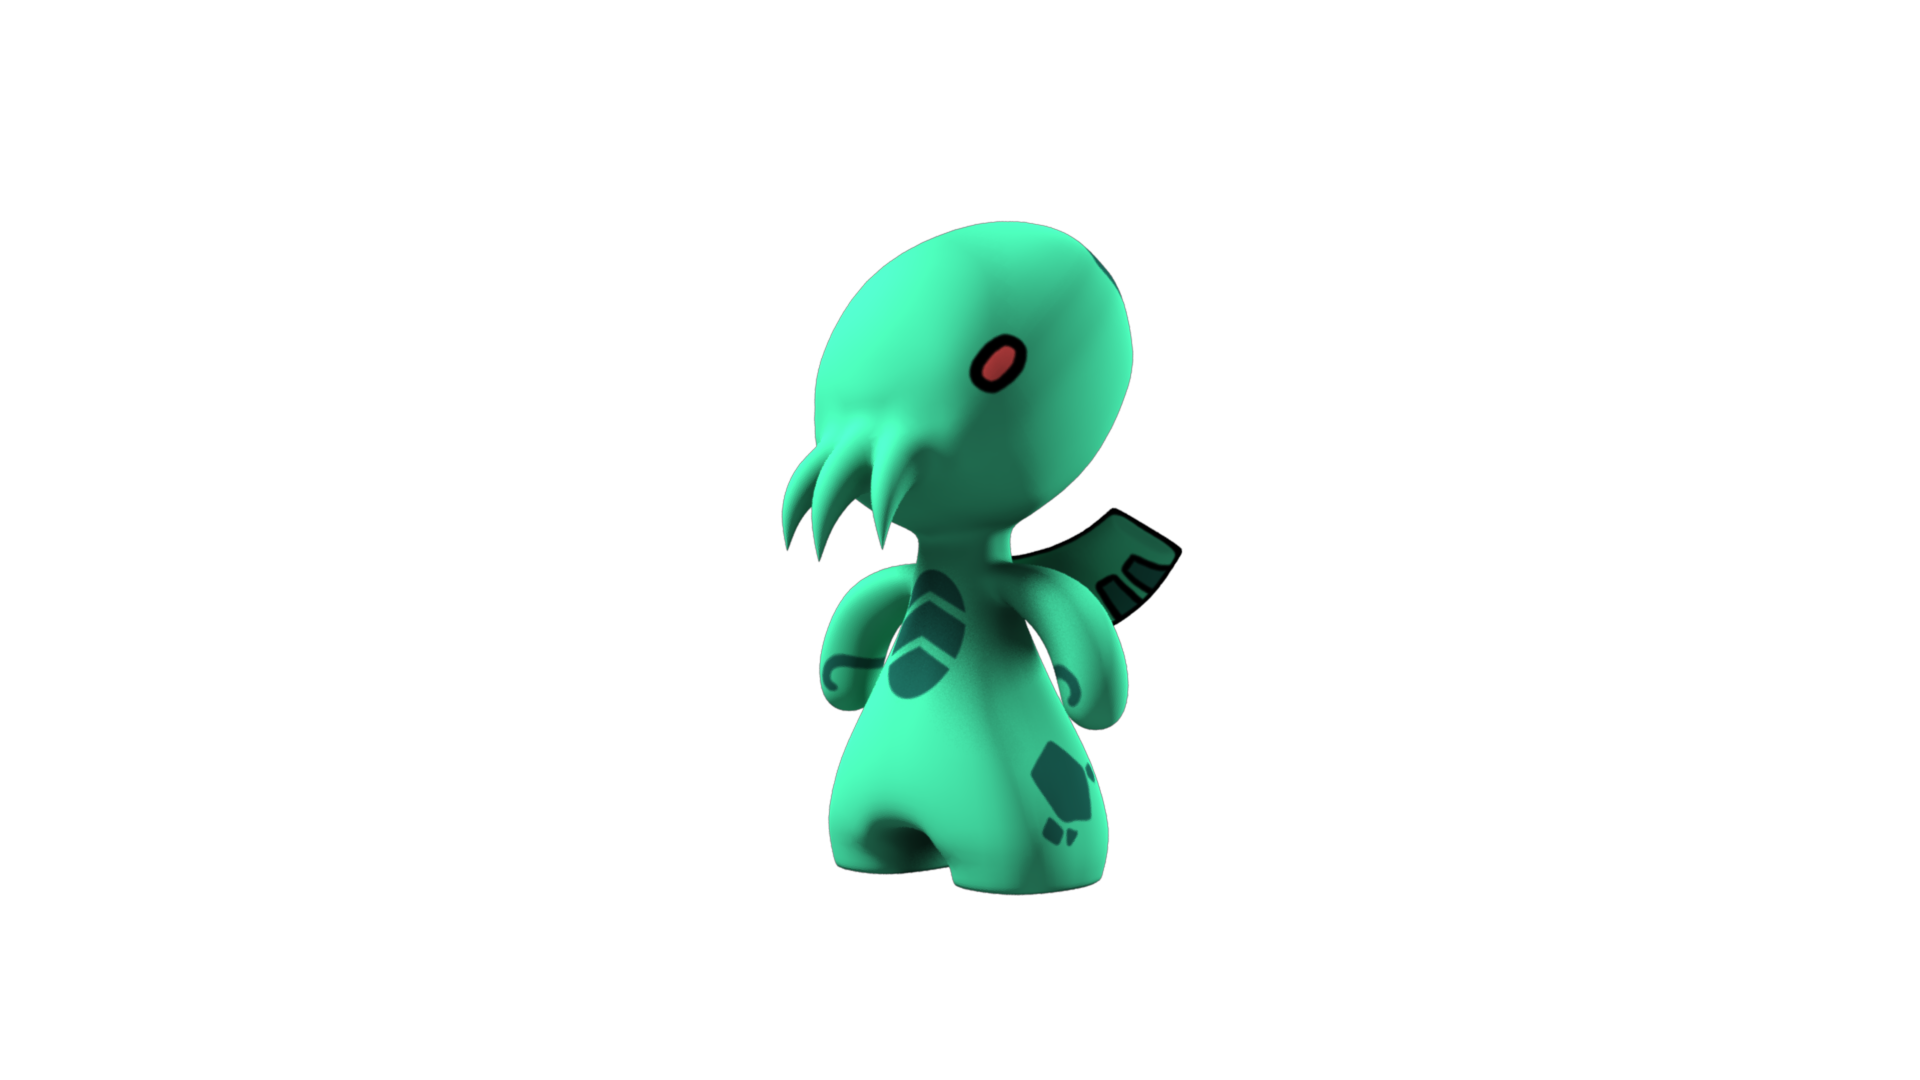
Texturing for Cthulhu was relatively straightforward, as there were few textured features in the design. The patterns on either side of its legs were carefully aligned so that they matched up and looked seamless.
Lighting:

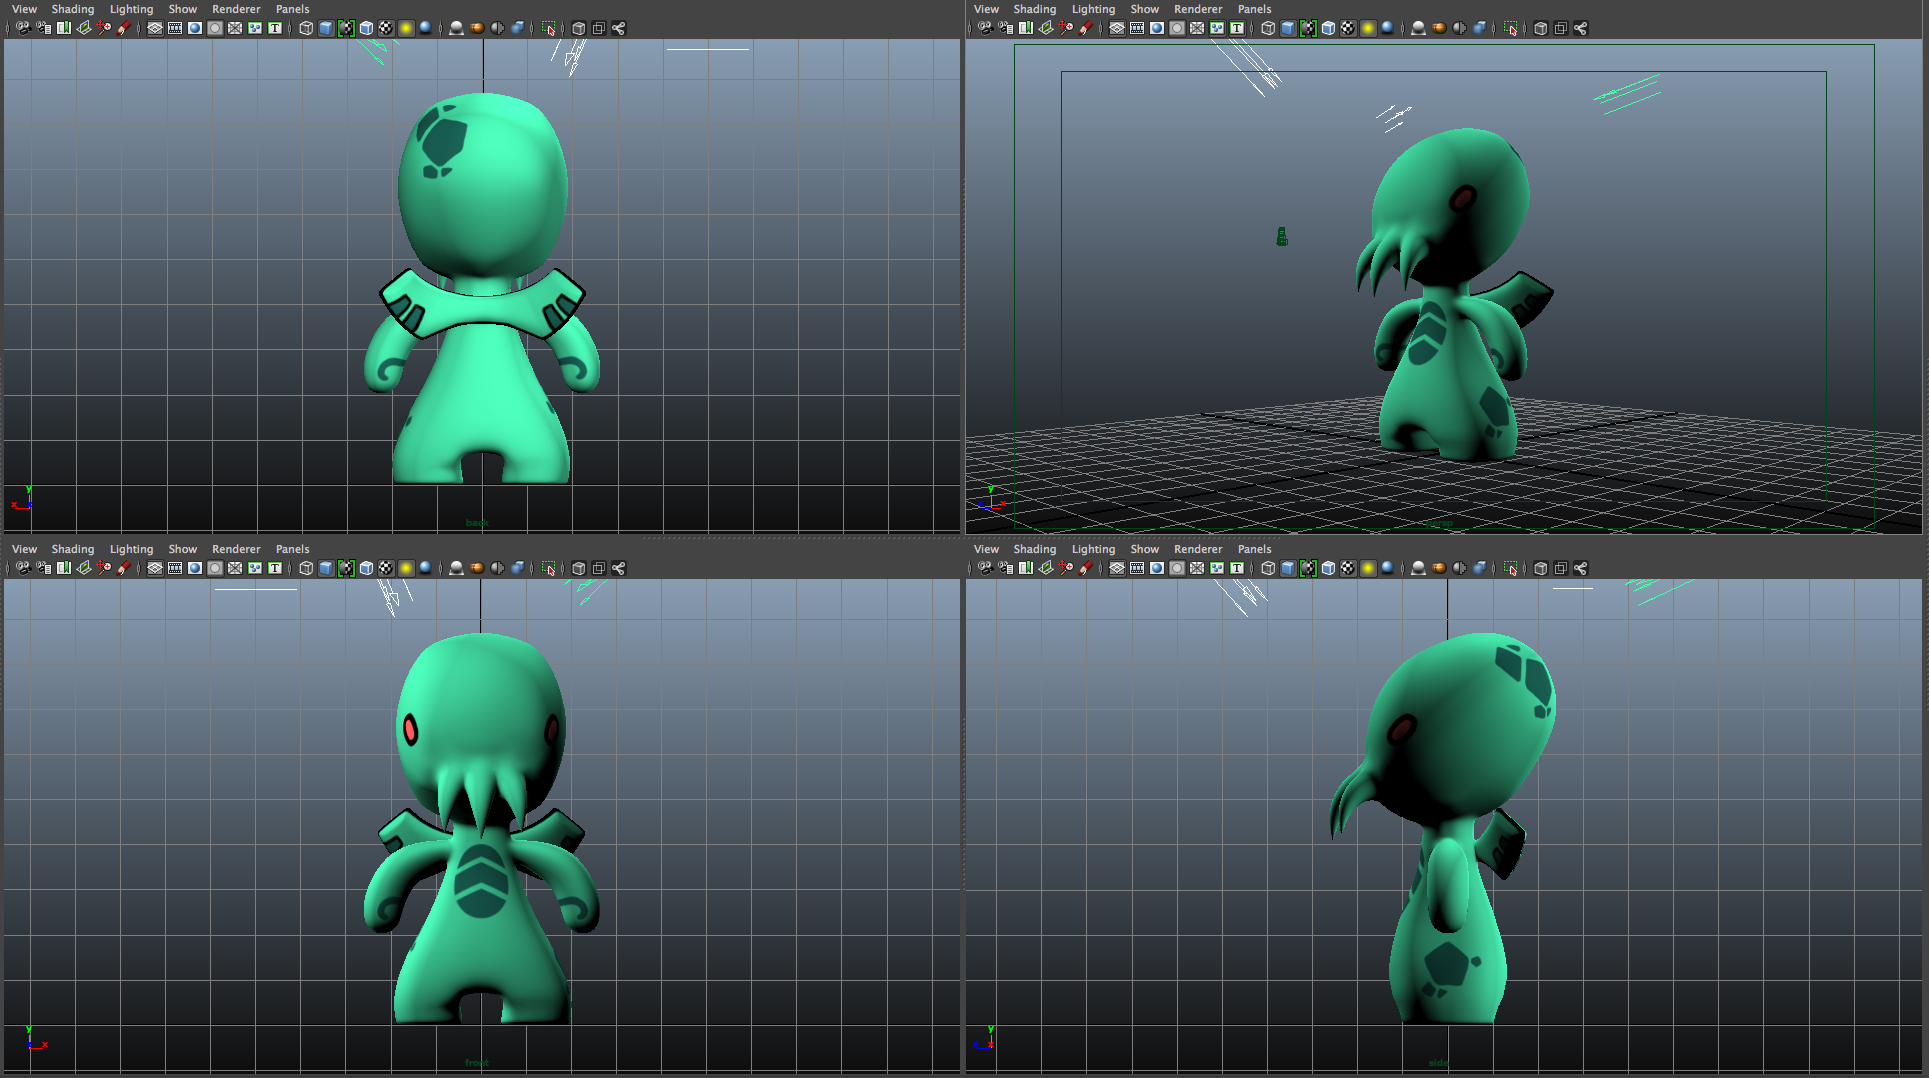


I created a very basic lighting scene for the models, making use of a key light, fill light and back light to give a sense of depth and realism to the models. Although the lighting for the scenes did look well adjusted, I feel like I wasn’t able to properly utilise the back light, and that I didn’t have as much control over how soft the edges of the lights were. This is definitely something I’ll have to explore further.
Group Shot Posing:


As the deadline was approaching fast, I had to decide not to try and produce a third model as time would not permit me to do so. With this in mind, I moved on to posing my two characters for the group shot. I figured that with my two characters being monsters, it would be fitting to see a shot of them battling against each other, with both characters wrestling.
Unfortunately, when modelling the characters, I hadn’t thought to put the characters in a bind pose with the arms outstretched. This meant that I was unable to attach deformers to the arms in an effective manner to easily adjust the characters’ arms. I had to select the faces of the arms in groups to rotate them in a way that would resemble the results effective deformers would have produced, causing more work for myself.
Rendered Shots:
Cthulhu


Quetzalcoatl


Group Shot

Great job. Really cool character designs; simple and effective.
LikeLike