WEEK 5 RESEARCH TOPIC

“What does a typical animation production pipeline look like, and how does it function?”

Like film, animation productions will typically be broken down into three main stages, Pre-Production, Production and Post-Production. Each stage can be further expanded into key tasks that need to be completed.

Pre-Production:

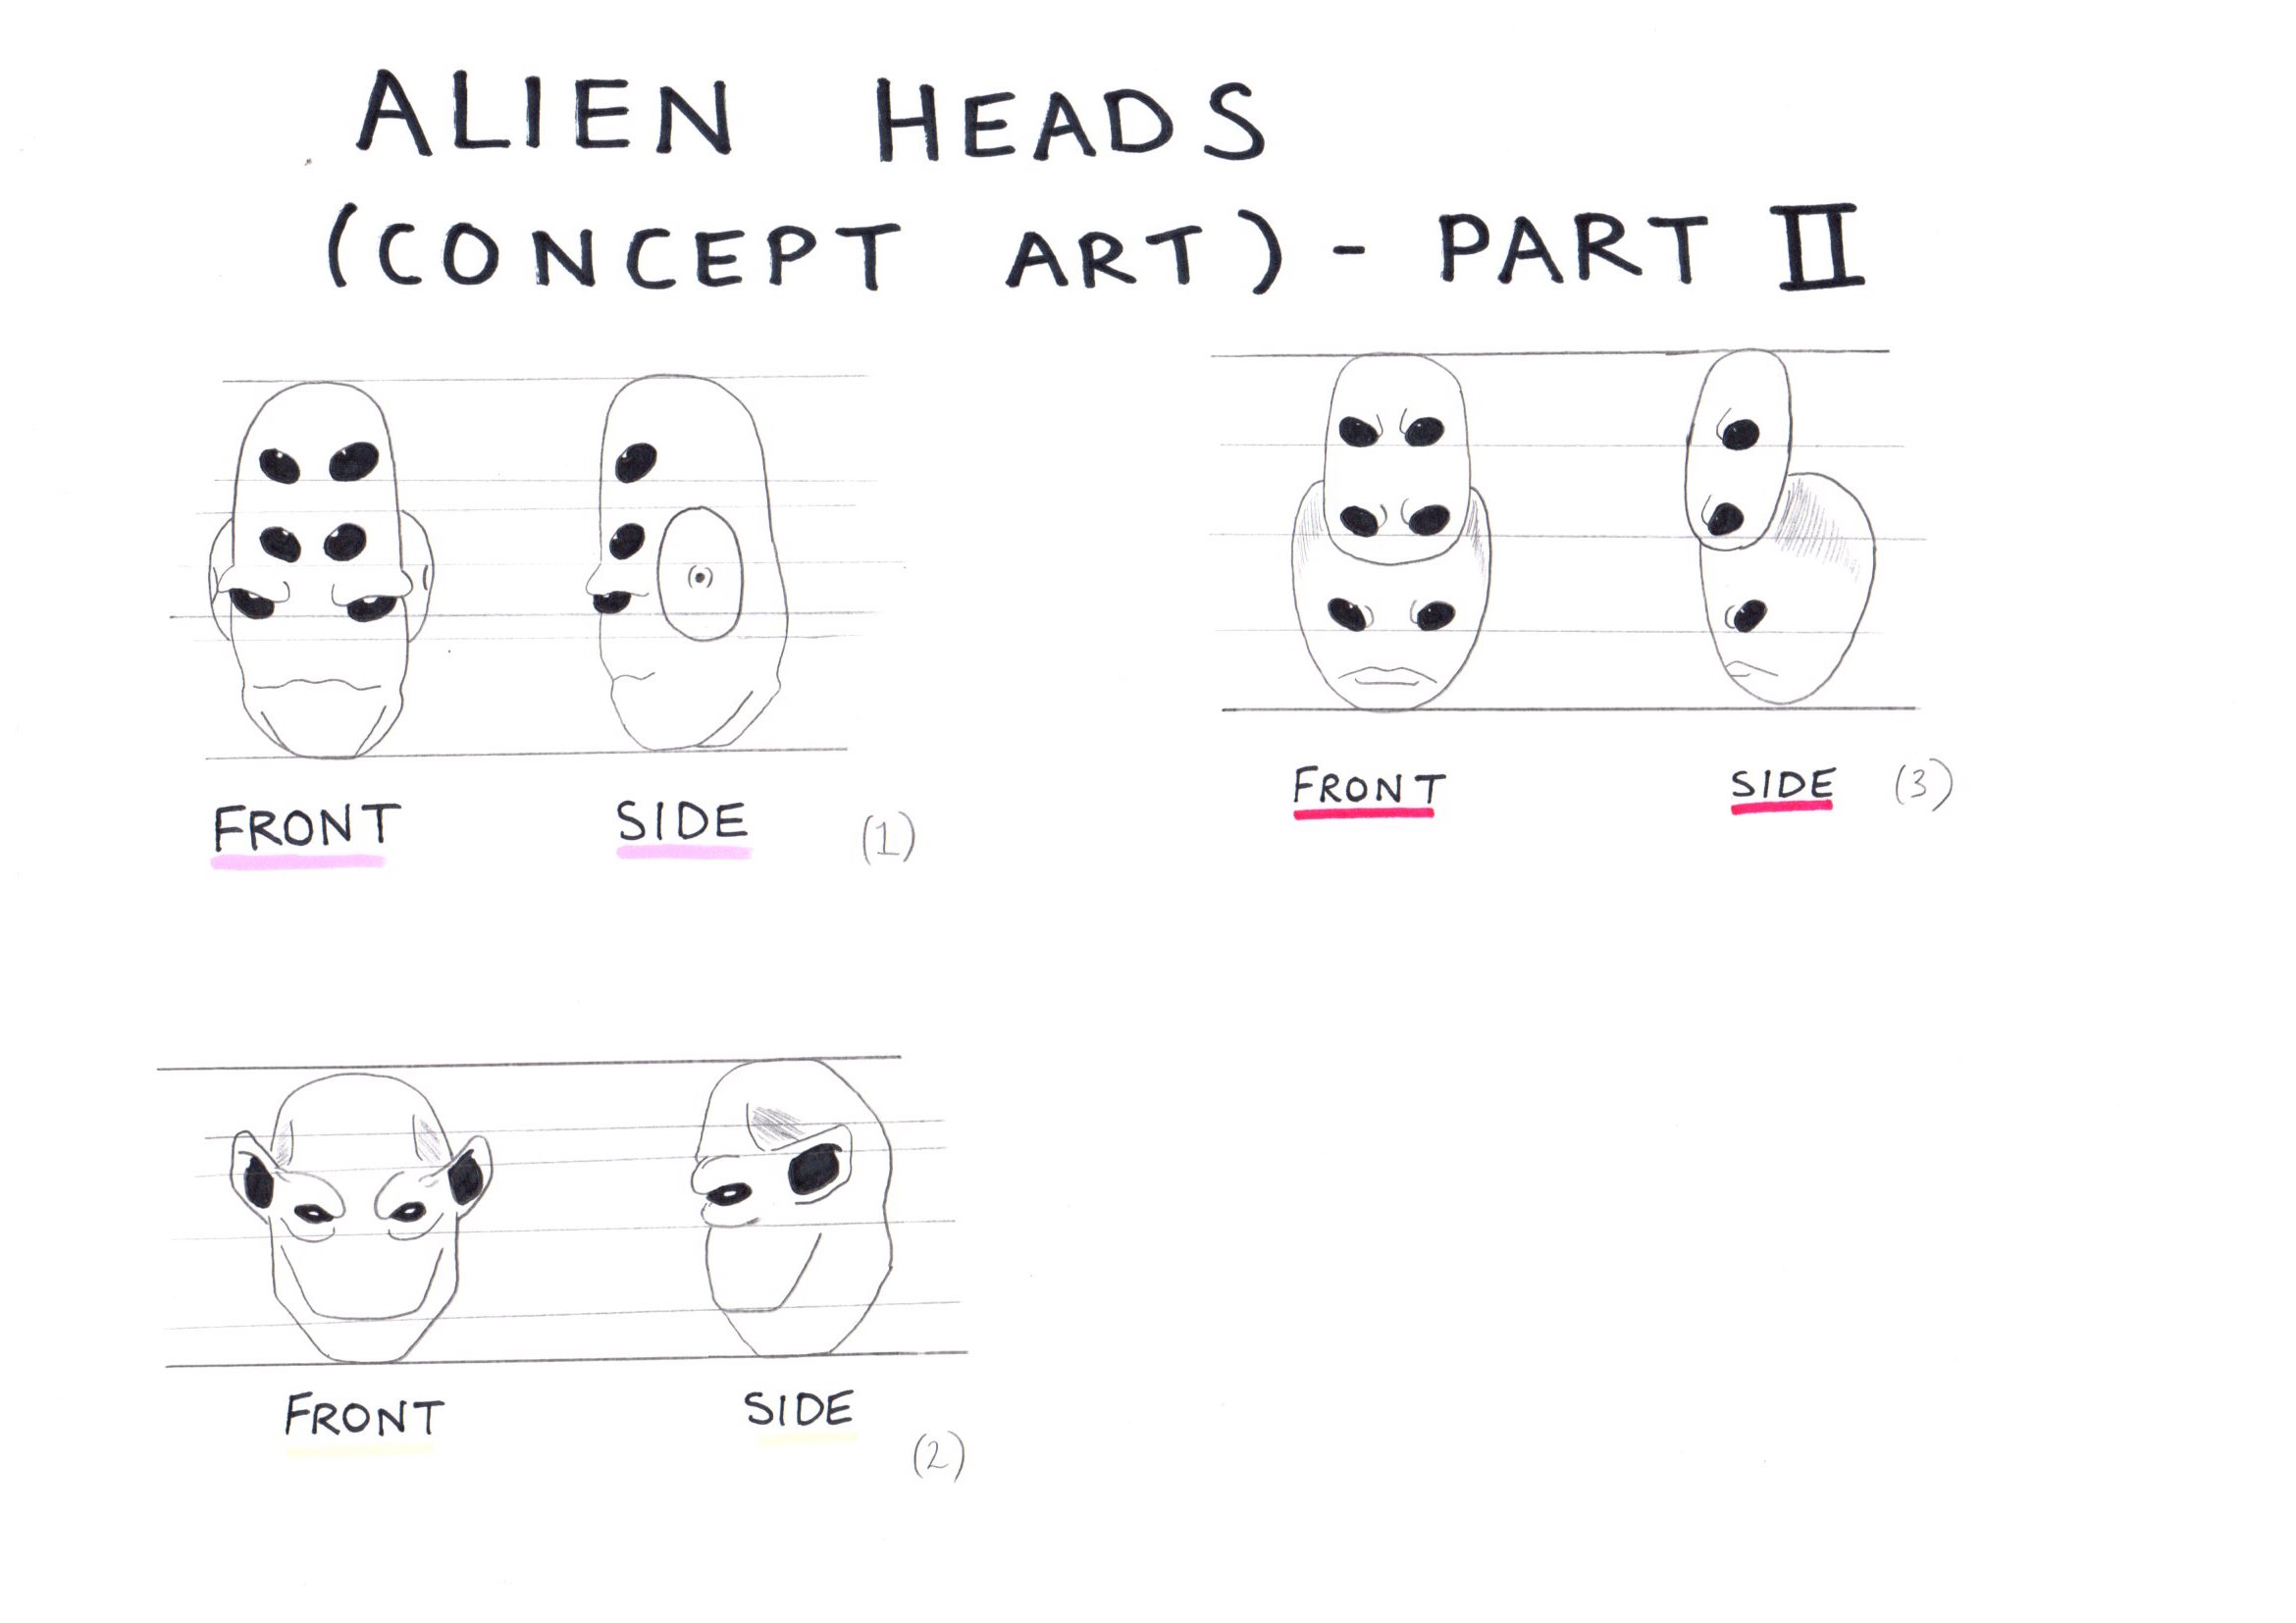
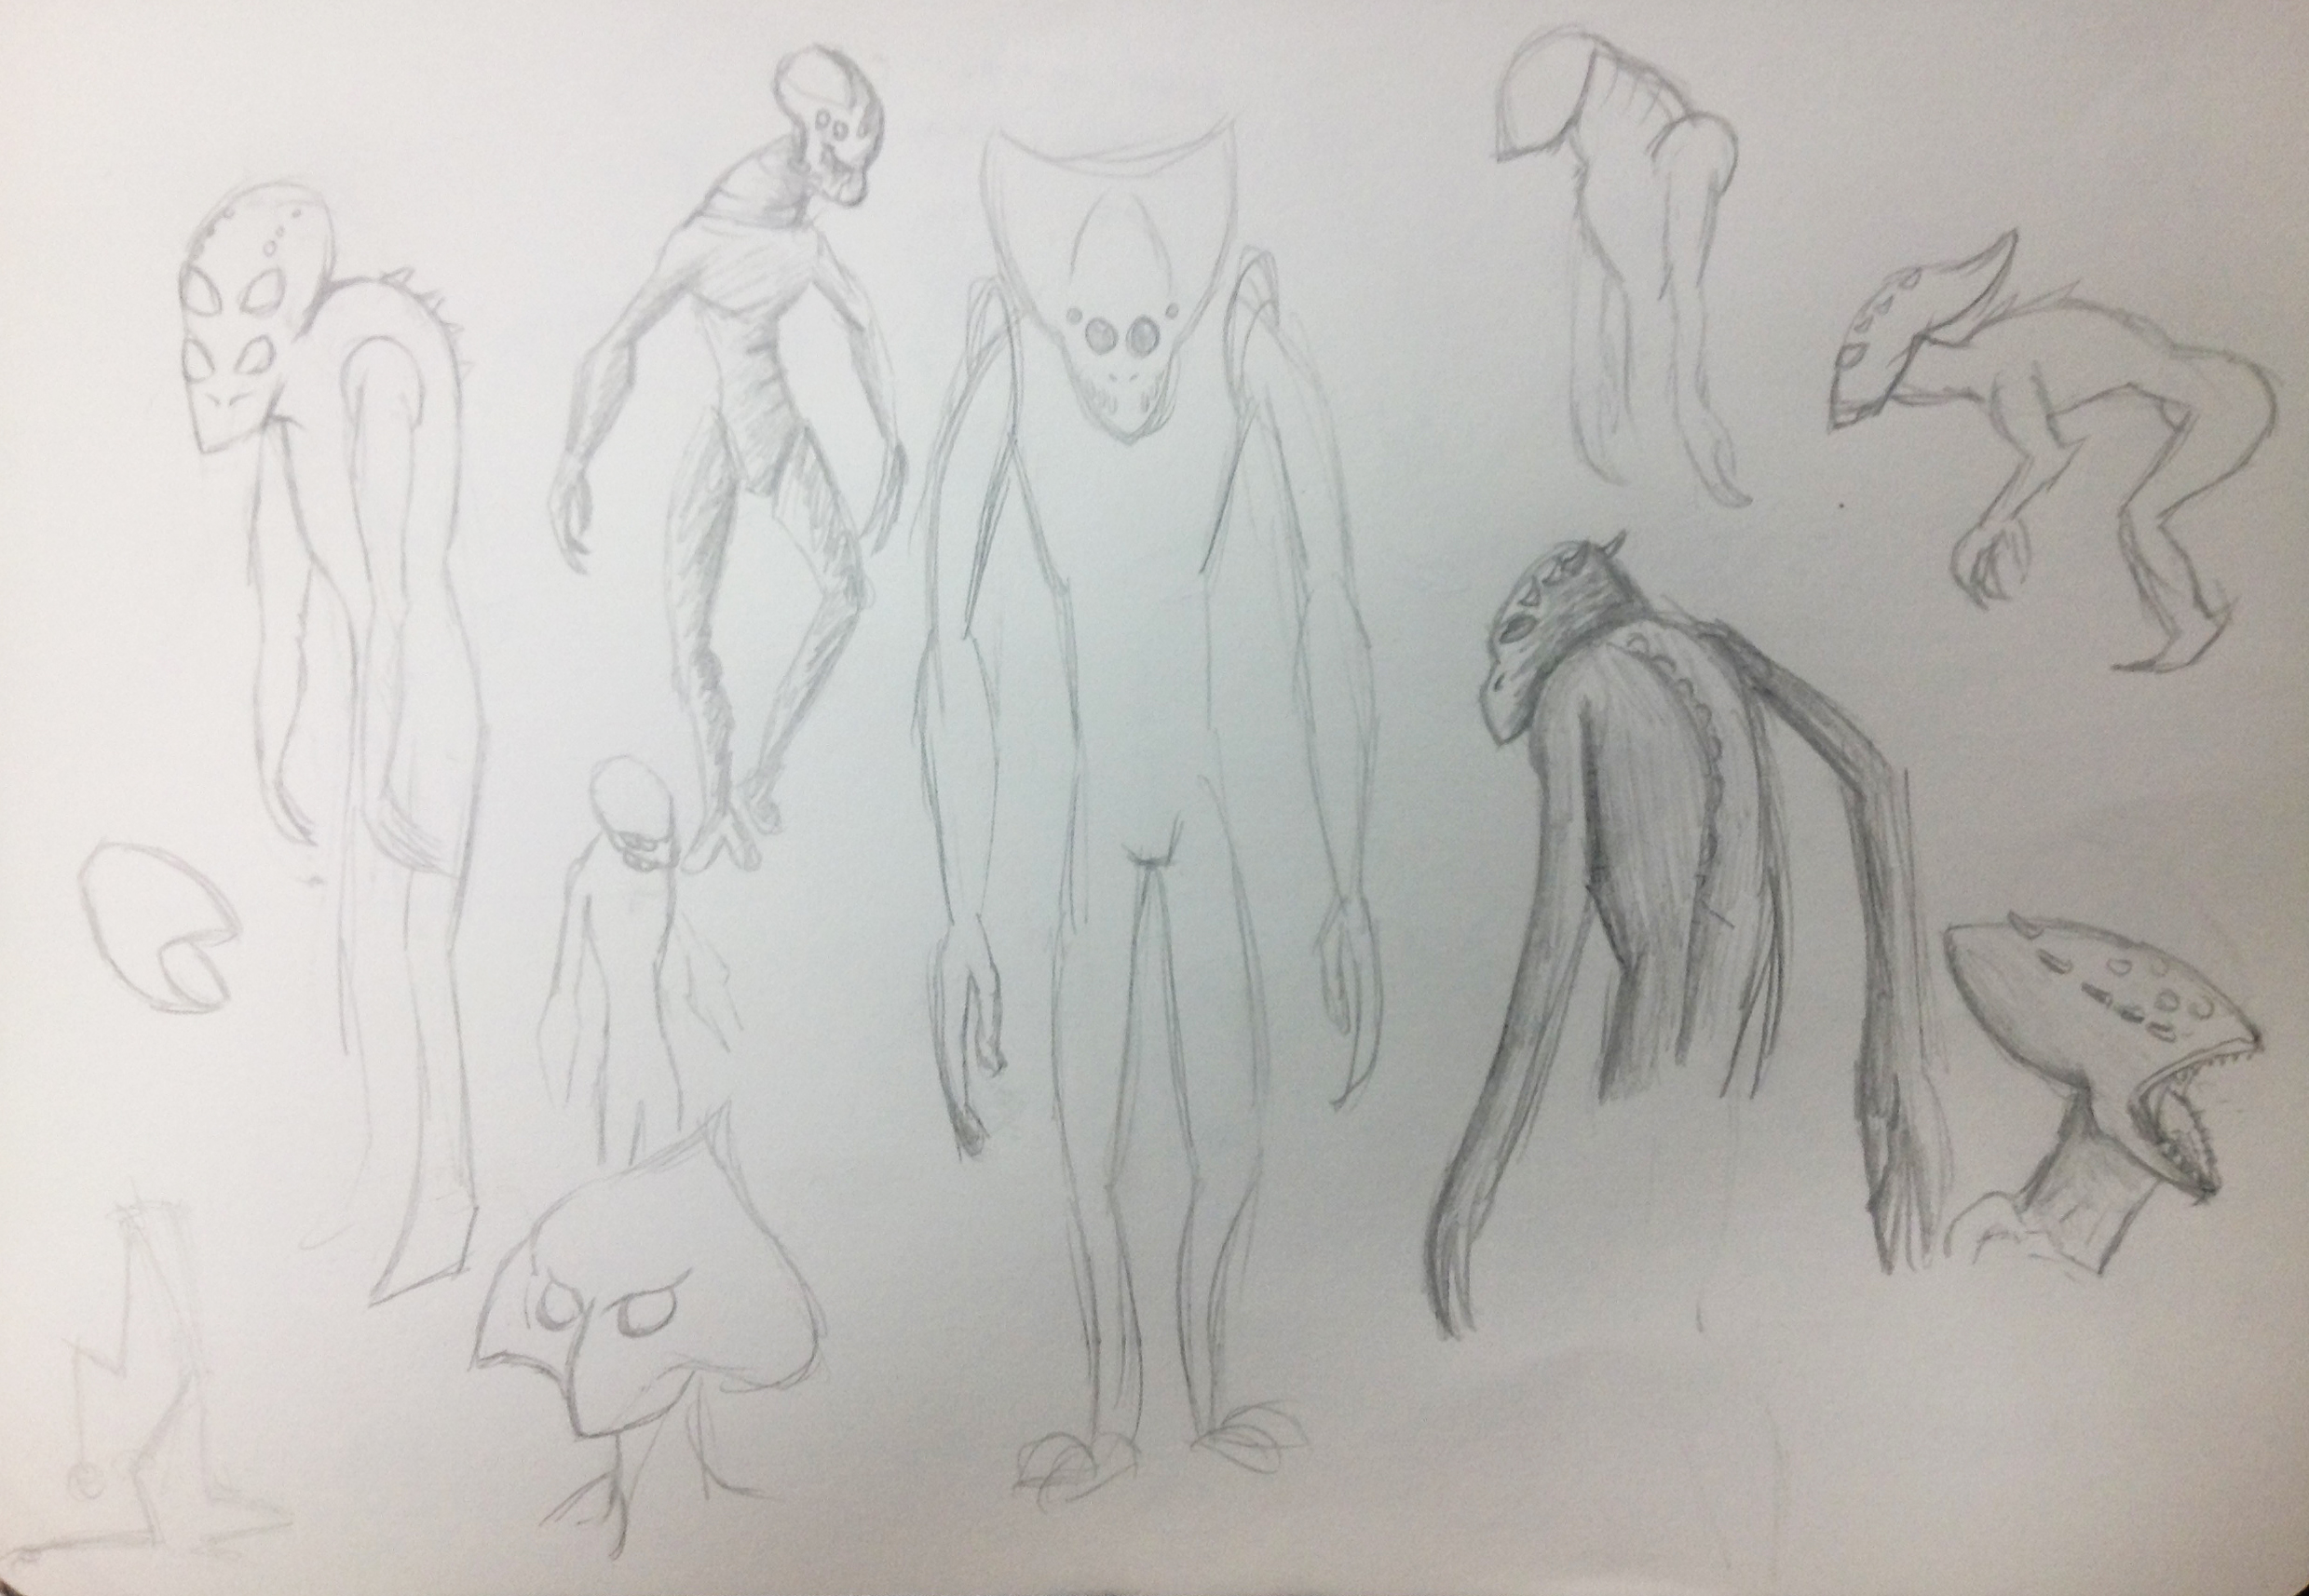
The pre-production of an animation should be seen as the problem solving phase (Gossman, 2011), where the project idea becomes a solid sequence of events that will be created through animation. It explores ideas and possibilities thoroughly before the production stage in order to prevent any issues that may appear later in the project.

While this may seem menial, it can easily consume the majority of the project as the concept is solidified. This stage sees the transition from animation idea to script, concept art and model sheets into storyboards and animatics, and sets the strong foundation for the animation production to go underway.

Astrid Concept Design

Production:

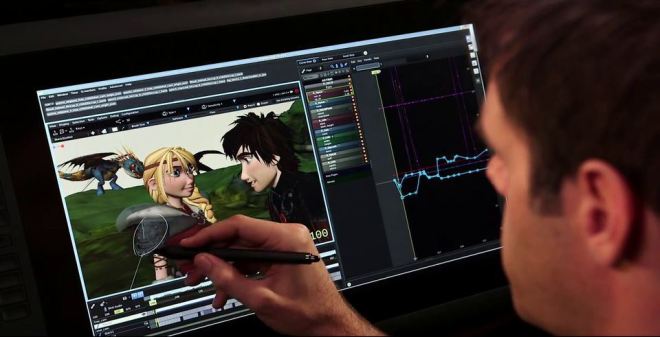
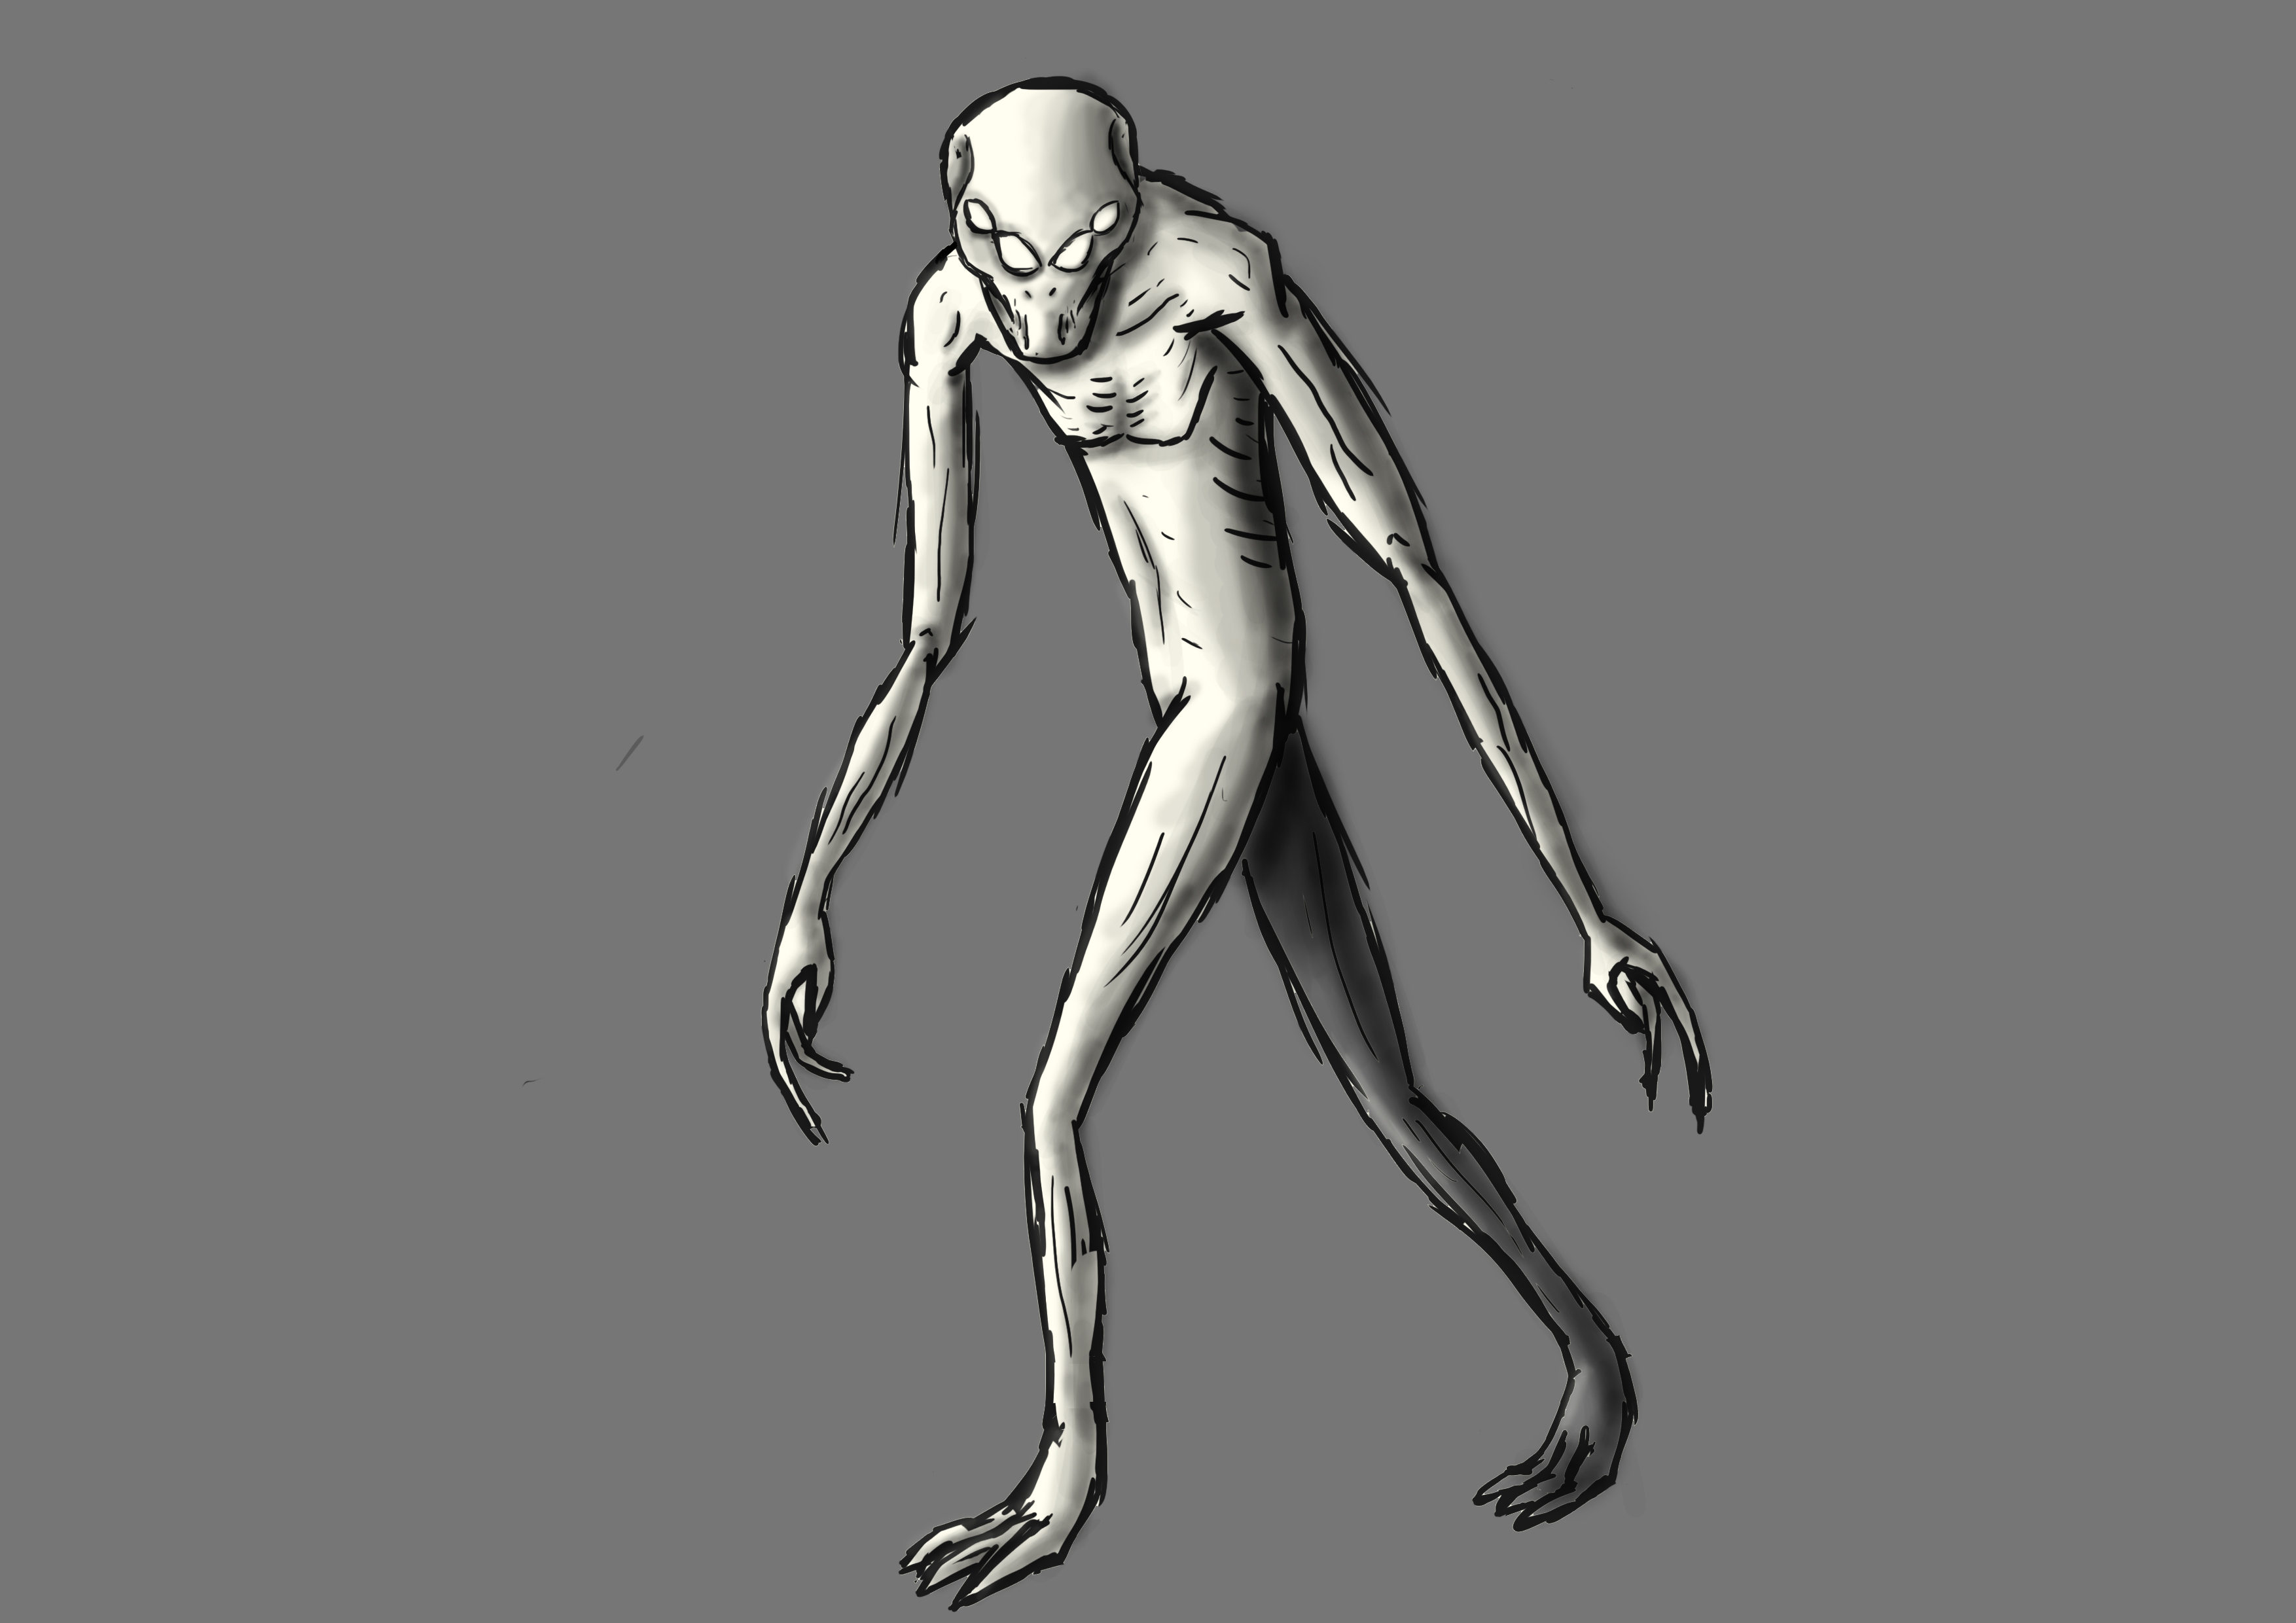
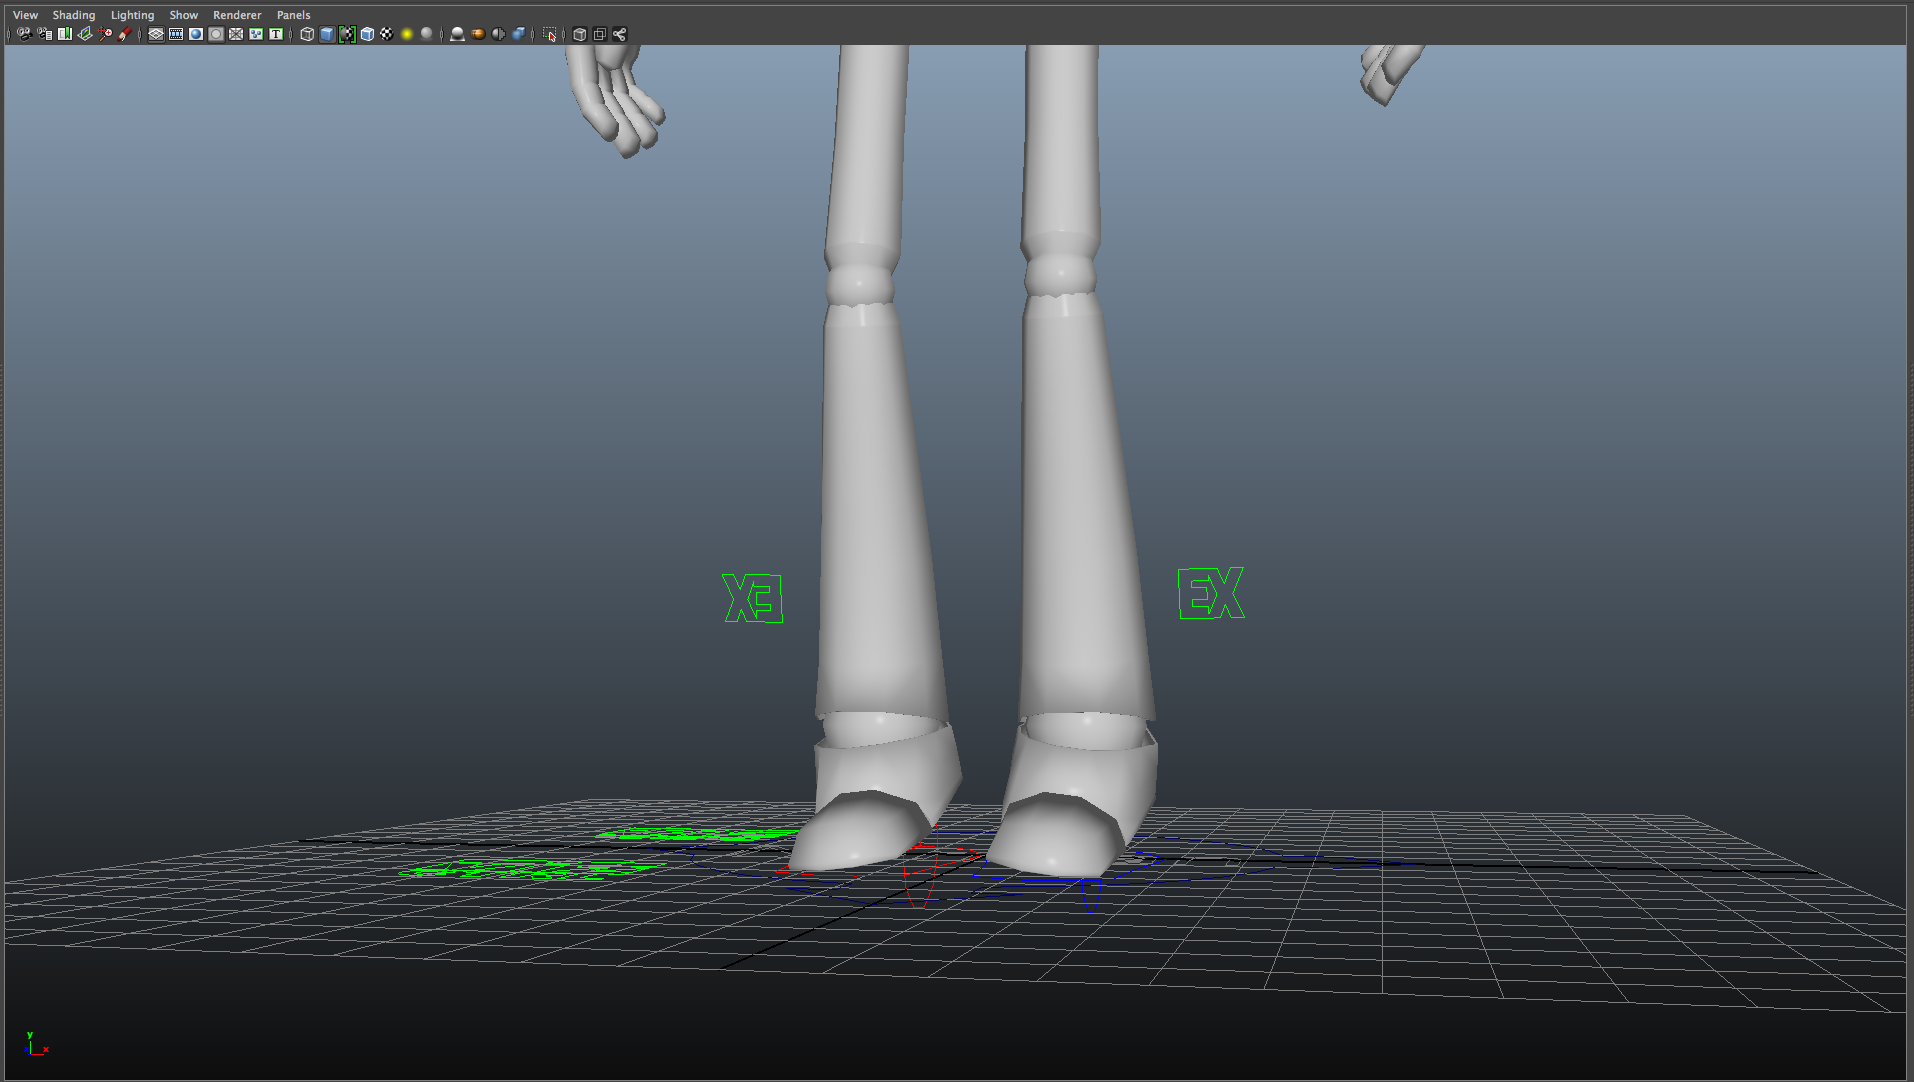
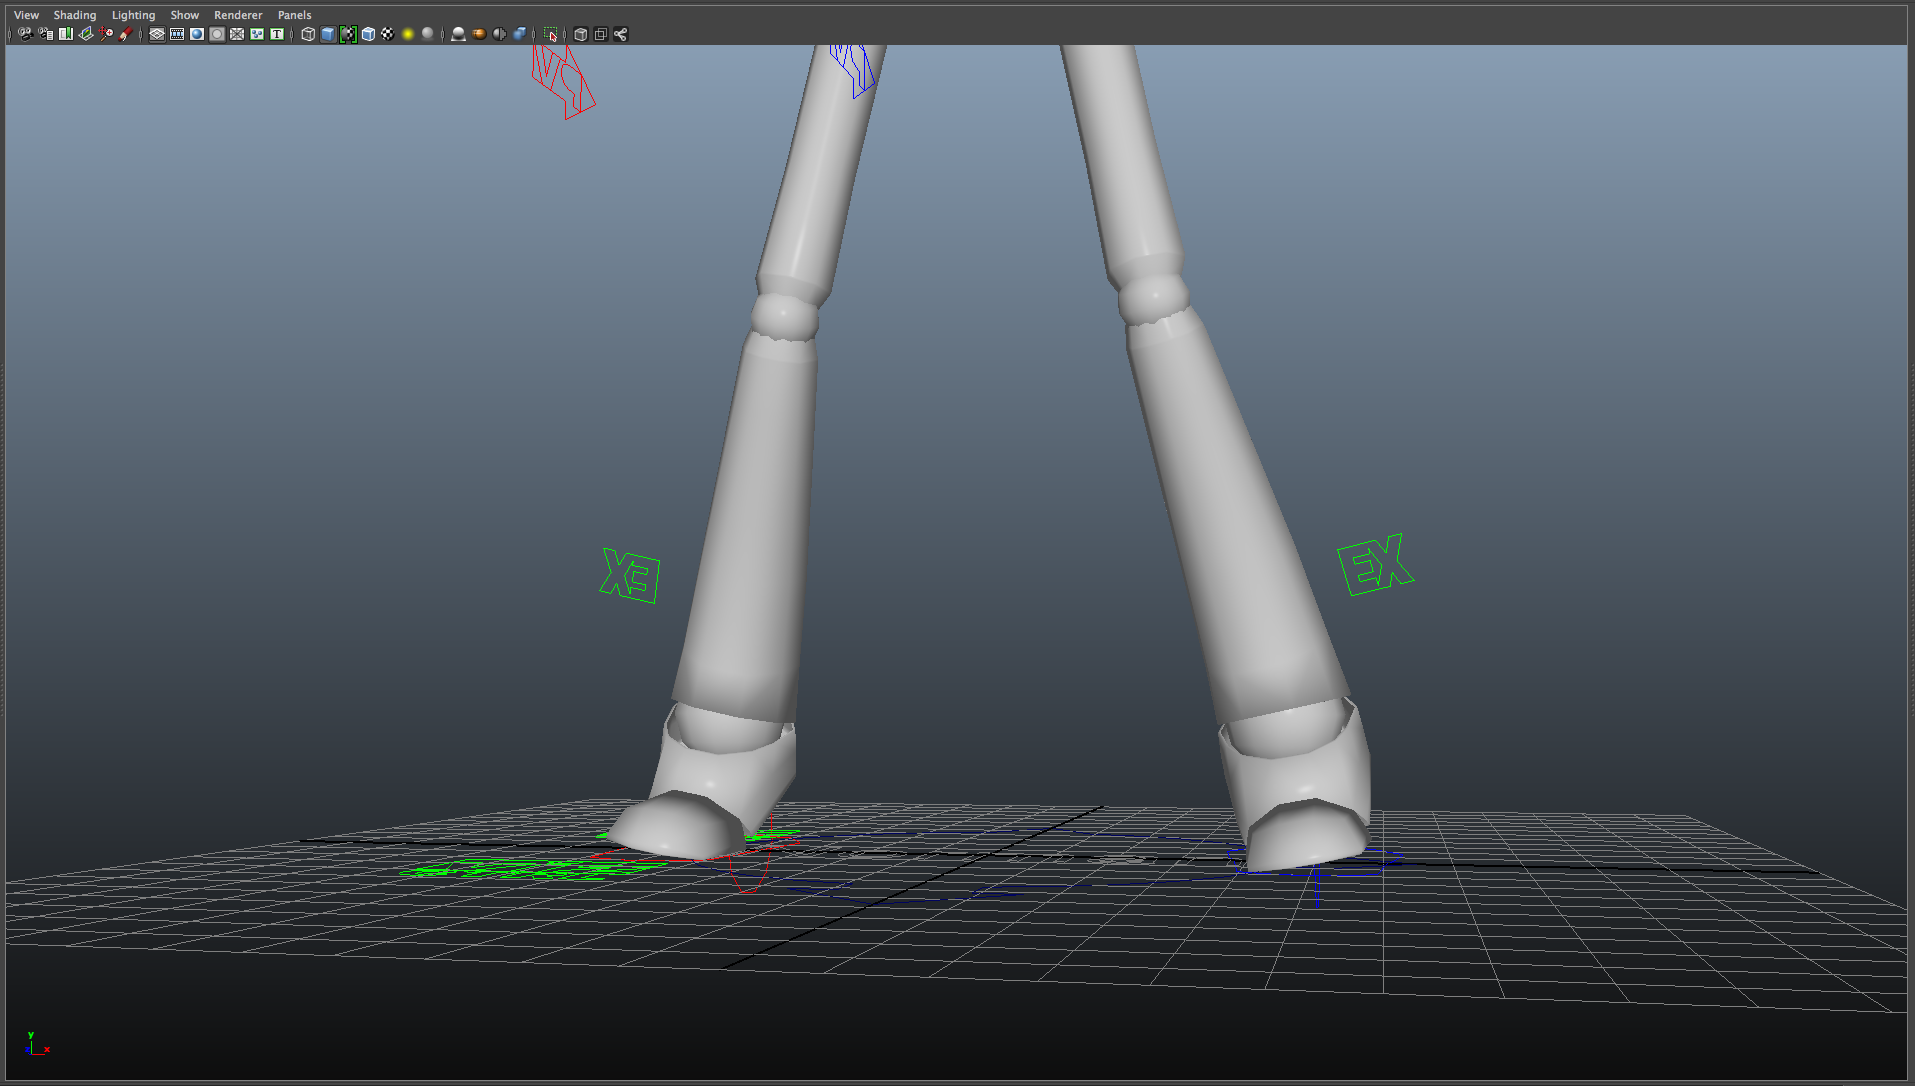
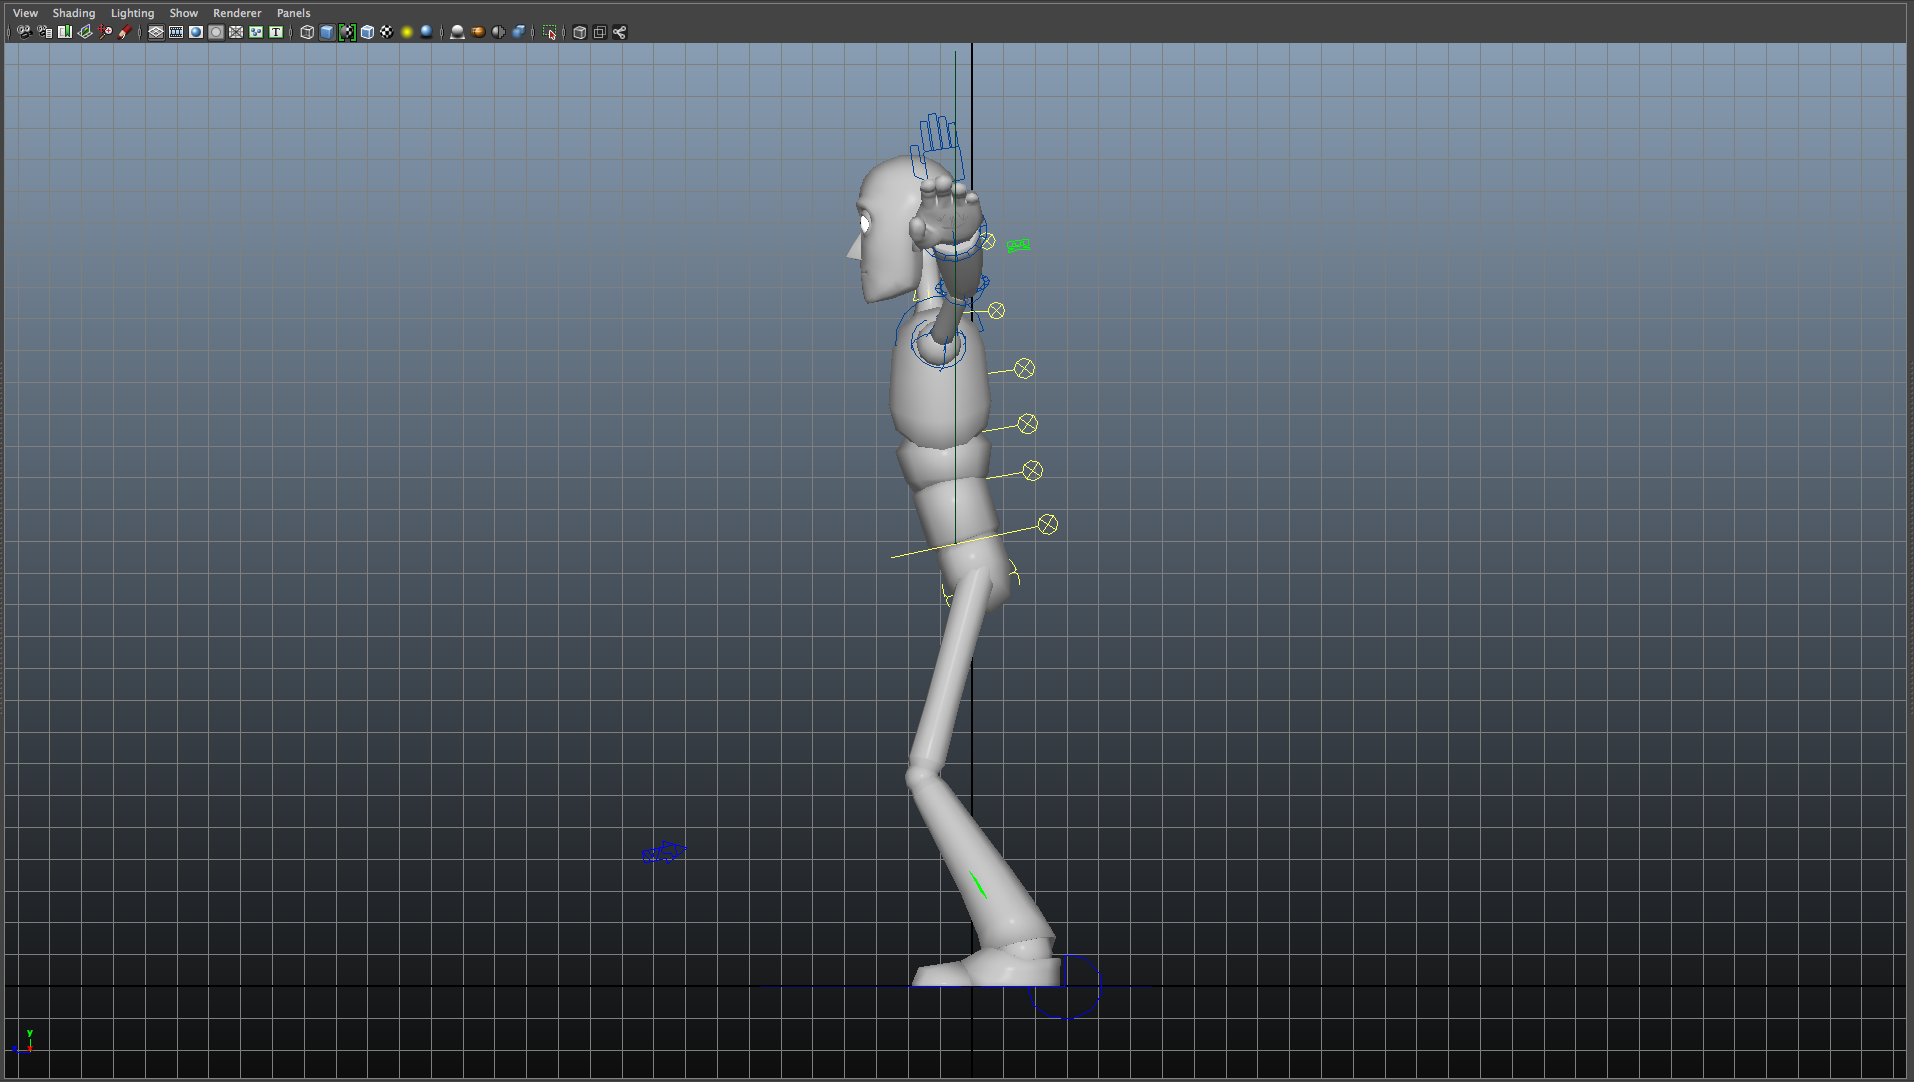
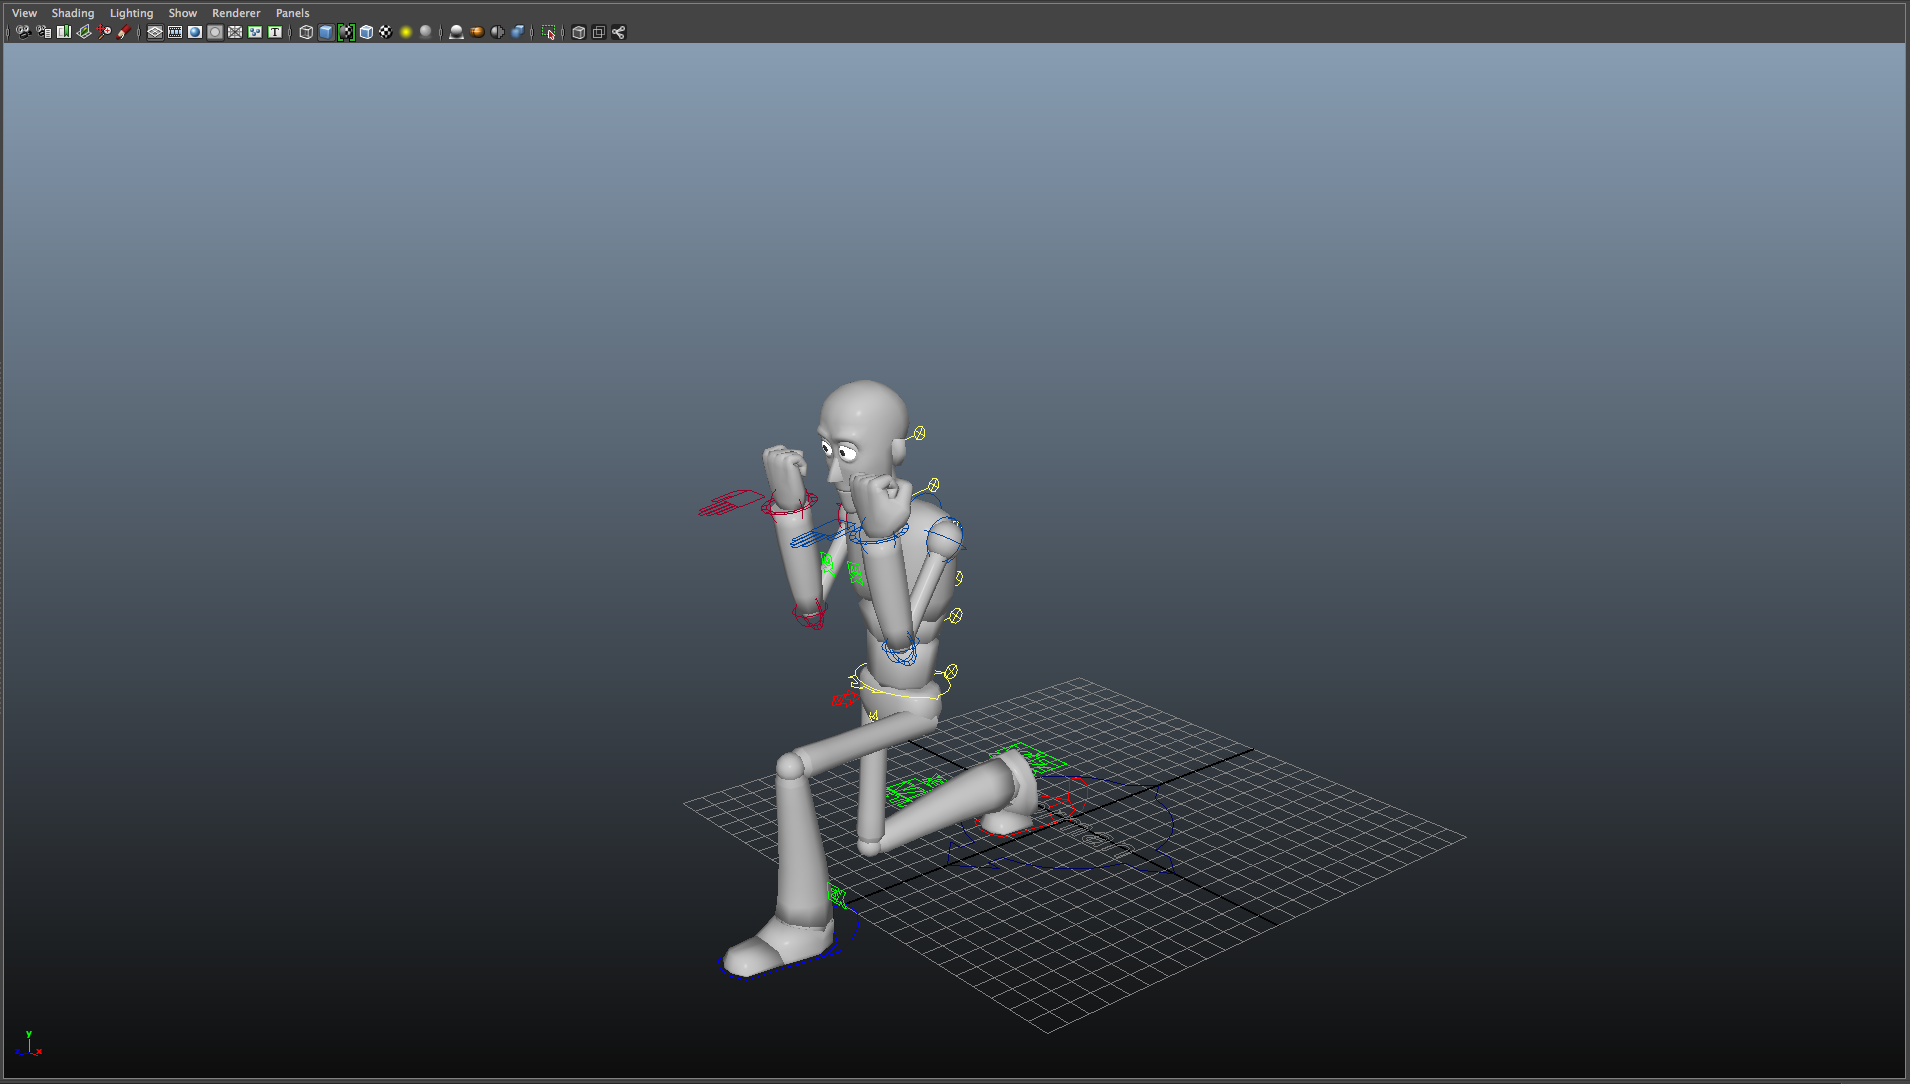
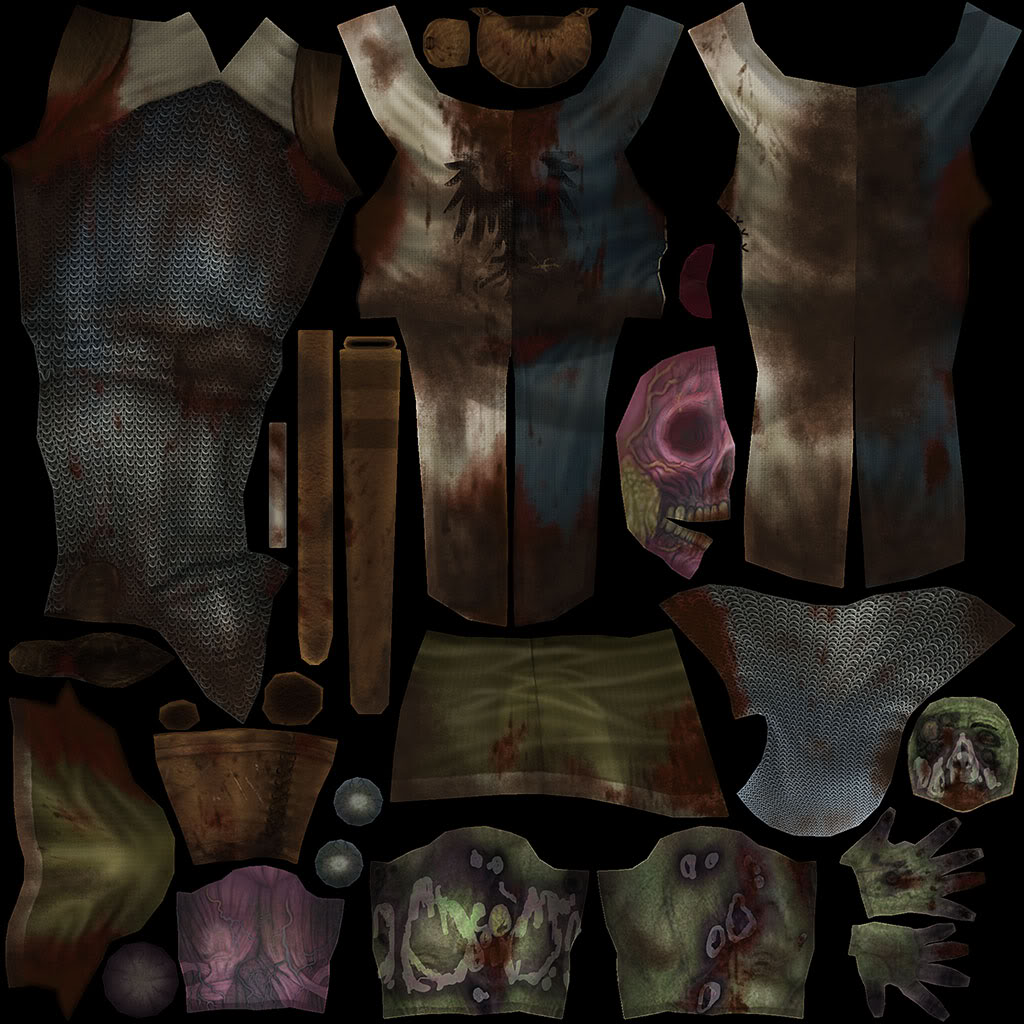
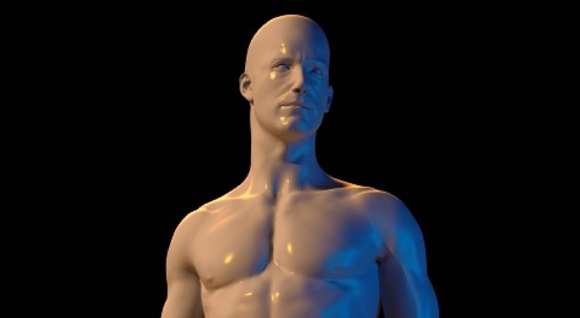
During production, the animation will be created based on the storyboards and animatics previously produced, with any voice recording happening early in the stage. In 3D animation, any characters, props or locations must be modelled, textured and rigged, while in 2D limited animation, character puppets may be produced, textured and rigged. Traditional 2D animation may forego this step, instead moving onto scene layouts, where key frames and backgrounds are produced ready for animation, while 3D scenes will be set up with locations, basic blocking and camera movements.

Astrid Model

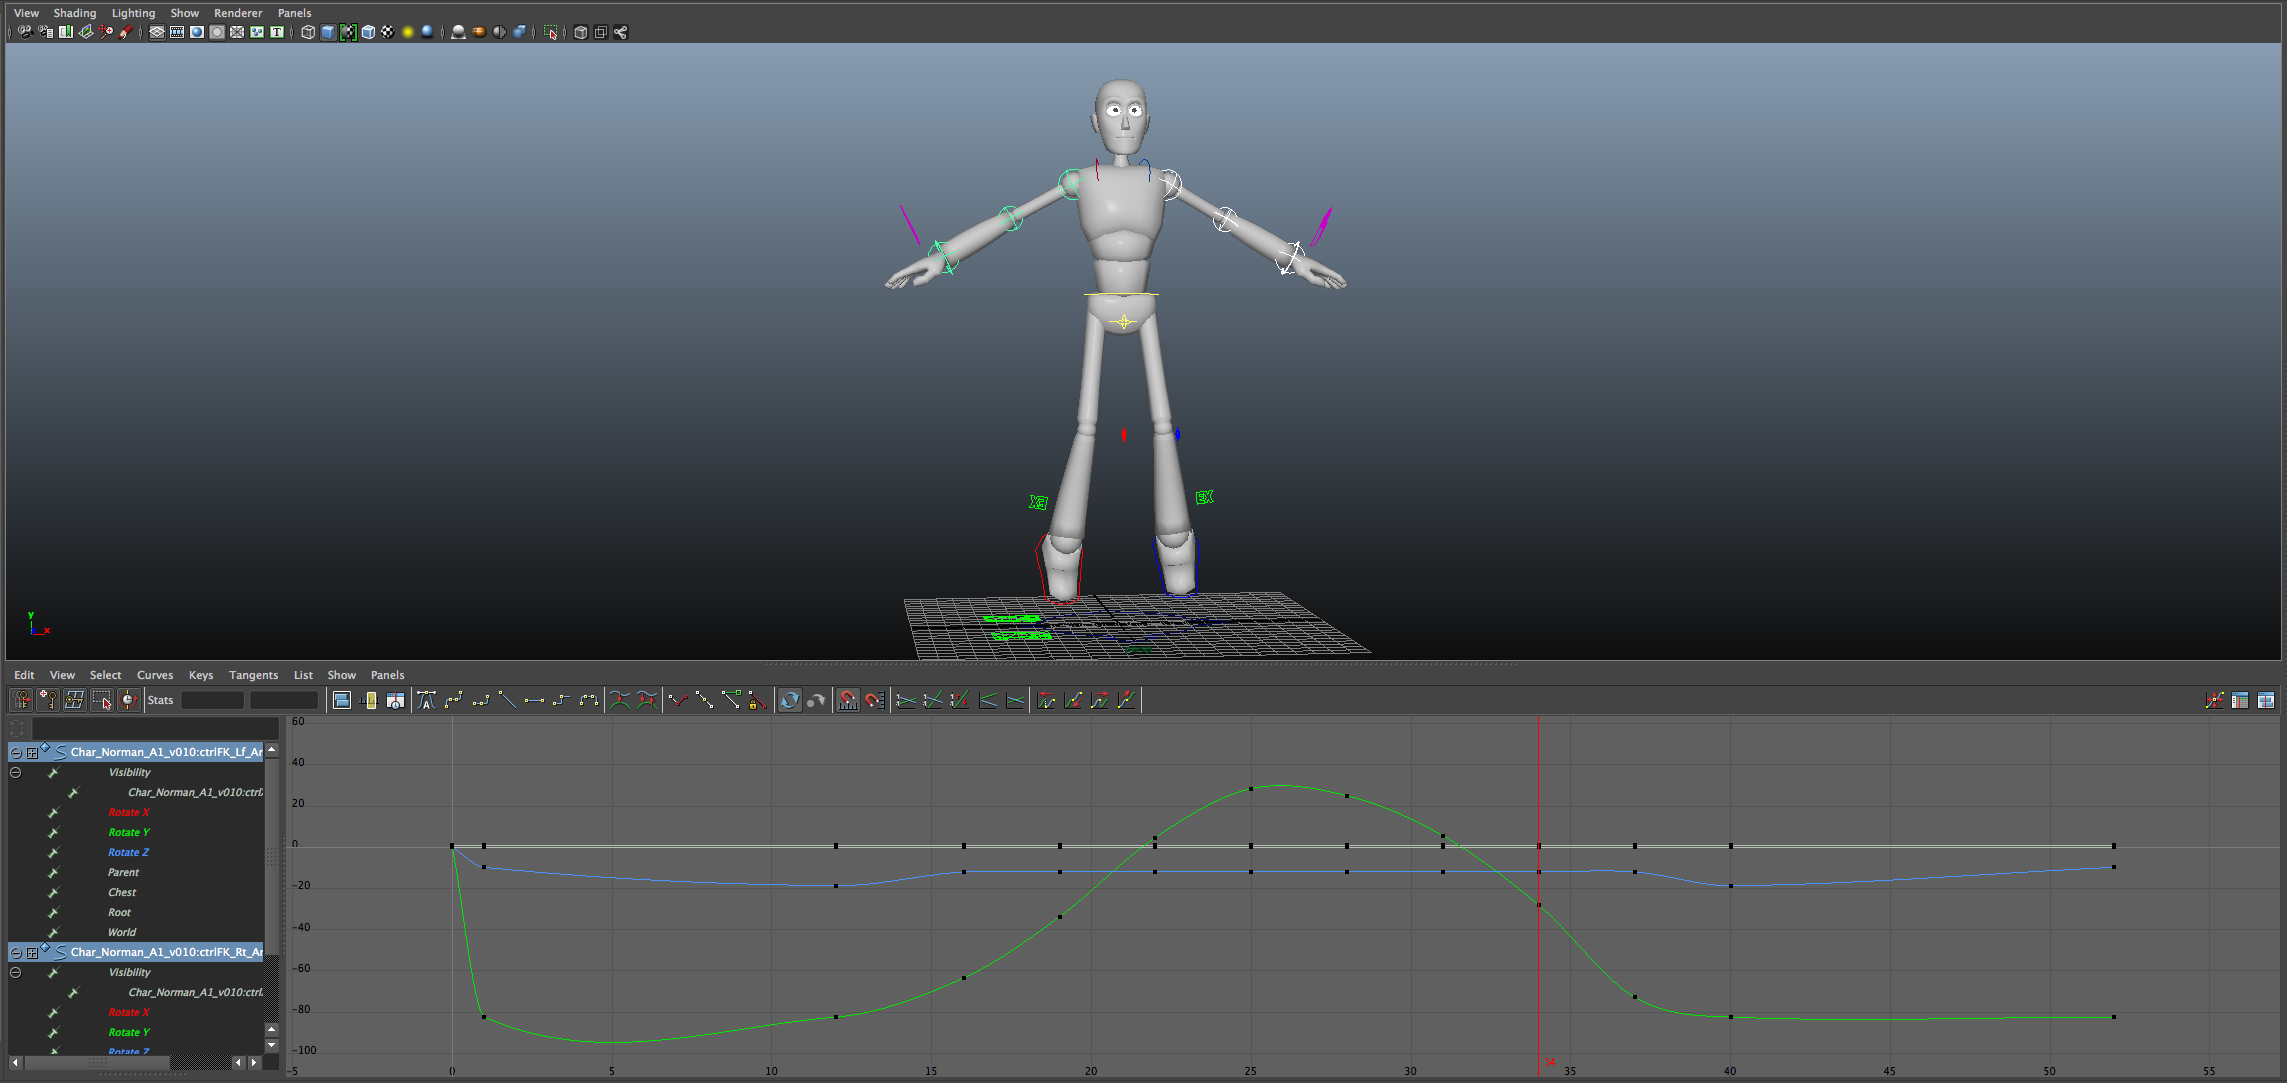
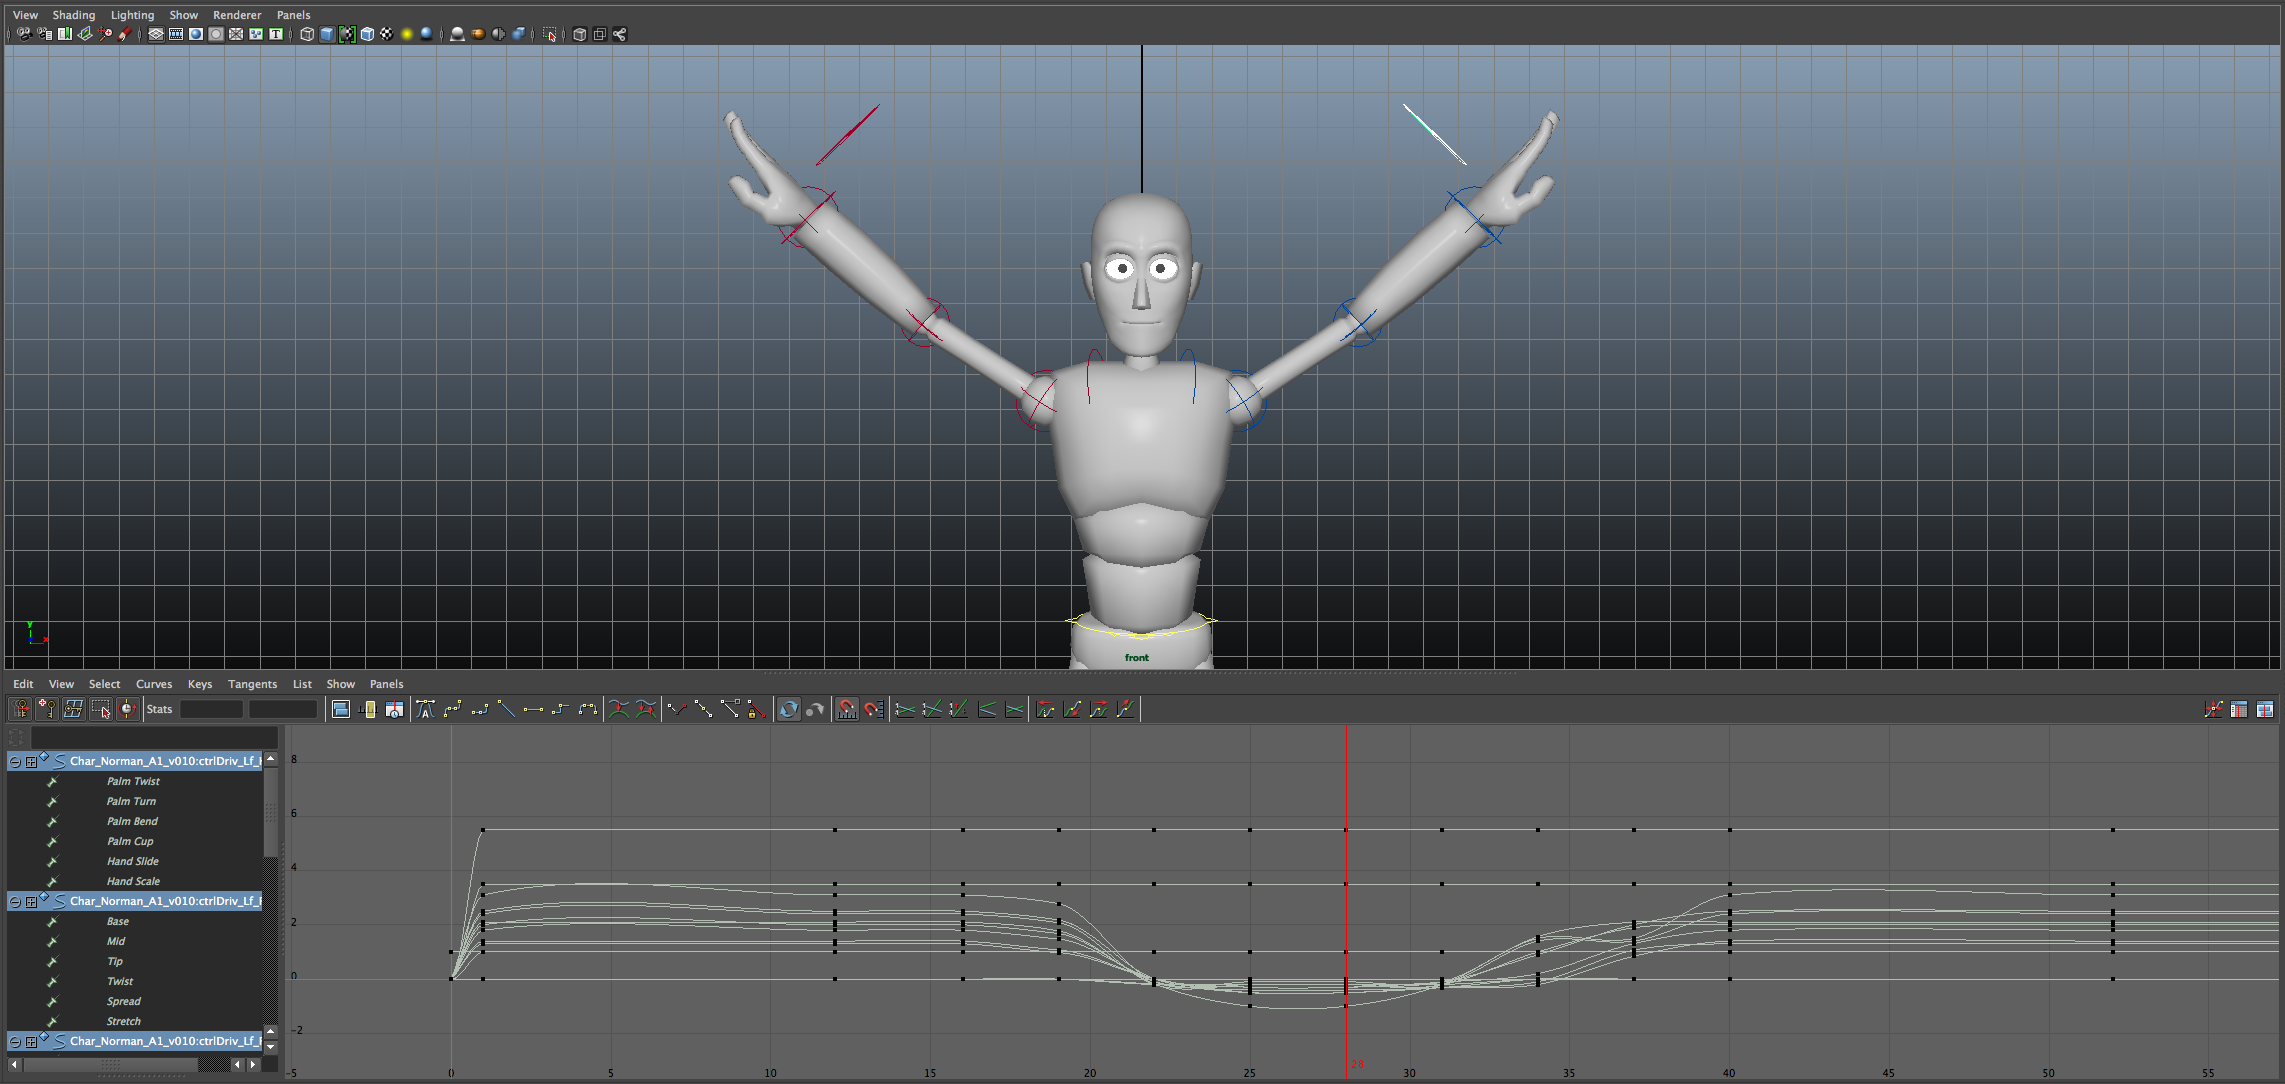
From here animators can take over, splining in 3D animation or producing breakdowns and inbetweens in 2D animation to meet the storyboards and animatics, often with many animators working on separate shots or scenes to reduce production times. Afterwards, 3D scenes will be lighted and rendered into multiple layers, while 2D shots will be exported.

Animating How to Train Your Dragon 2

Post-Production:

When the animation shots are exported, all layers will be composited together to produce the shots to be used in the final product. Here they will be edited together to create the final colour and lighting for each shot, with any voice recording, sound effects or score added to scenes.

References:

Animating How to Train Your Dragon 2 [Image]. (2014). Retrieved from http://www.cgmeetup.net/home/technology-behind-train-dragon-2/

Animation Production Chart [Image]. (2014). Retrieved from http://studentlearning-animation.blogspot.com.au/2014/06/test-post.html

Astrid Concept Art [Image]. (2014). Retrieved from http://skunkandburningtires.tumblr.com/post/87234017564/astrid-hofferson-concept-art-by-nico-marlet-megan

Astrid Model [Image]. (n.d.). Retrieved from http://dreamworks.wikia.com/wiki/Astrid_Hofferson

Gossman, R. (2011). The Animation Production Process. Retrieved from http://nir3d.com/handouts/Handouts%20History%20of%20Animation%20-%20(DIG1022)/Ani_Prod_Process.pdf

Vardanega, J. (n.d.). Pixar’s Animation Process . Retrieved from http://pixar-animation.weebly.com/pixars-animation-process.html

Willett, N. (2010). Animation Production Pipeline. Retrieved from http://physbam.stanford.edu/cs448x/old/Animation_Production_Pipeline_(2d)_Nora_Willett.html

WEEK 5 RESEARCH TOPIC

Project 3, Pt 2 – Concept Designs, Location Photography & Scene Set Up

Concept Design:

Designs:

Since our last presentation, my team members and myself sketched out some alien concepts from our character moodboards, making sure to keep the alien looking slender and creepy as we previously discussed. As the location photography didn’t take me longer than a day, I decided to help out with sketching some alien concepts.

Emiddio:

Emiddio looked further into the difference head designs we might pursue, playing around with having multiple eyes to distinguish it as a non-human life form.

Alien BodiesAlien Heads (Concept Art) Alien Heads (CONCEPT ART -PART 2)

Ben:

As Emiddio’s designs were looking muscular, I wanted to have my designs looking more thin and wiry. I felt that his helped make the alien look weird and humanoid, while playing around with a few non-human head shapes.

Concept Designs_Ben_01

Alex:

Alex’s aliens were similar to my own, including a nice hunched back to his designs. This gives the character a more sinister appearance.

Concept Designs_Alex_01


Final Concept & Model Sheet:

The final alien design looks quite generic as we felt this gives one of the better impressions of a “realistic” looking alien. Although we explored more unique head designs, a very simple human shape ended up looking the best for the job. The long shapes in the body and limbs really work to make the design look eerie and disturbing.

pose

model sheet

Colour Variations:

Emiddio explored a wide range of colours, compiling the better suited colours for the shot. While we aren’t completely decided at this point, I’m more in favour of the muted tones, such as the top right and bottom right designs.

Alien mood board_02 (1)

Location Photography:

I went back to the Royal Botanical Gardens in order to get the final location shots. This pathway would give a clear view of the alien, while still being able to hide it behind some leaves of bushes.

IMG_7455

Alex commented that this hillside slope would look great with the alien dead centre and some mist or fog clouding the shot.

IMG_7460

This is the final location, which will be our location for the final shot. Although the image is quite yellow due to the colour of the streetlights along the pathway, the location was actually a lot darker and less saturated on the night. This means that the image will look fine after we’ve adjusted the colour, saturation and brightness during the compositing stage. We’ve decided to make the colour adjustments after the alien has been rendered into the scene so that we can adjust all elements of the final image at the same time.

IMG_7465

On a side note, it was difficult to get a clear shot of the pathway as joggers and fitness enthusiasts flooded the path while the sun was still out, meaning I had to wait until after dark to get the final shot. I made sure to capture a mirror ball shot of in the light and in the distant shadows in case we want our alien our in the open or hidden in the dark.

Unfortunately it was difficult to get a clean shot of the mirror ball in the shadows, but luckily it’s main purpose it to reference the direction of the lighting in the scene, so the quality doesn’t need to be extremely high.

IMG_7471sadsad

Project 3, Pt 2 – Concept Designs, Location Photography & Scene Set Up

Project 3, Pt 1 – Project Documentation & Alien Mood Boards

Project Documentation:

Gantt Chart:

Gantt Chart


Division of Tasks:

As there are three team members working on this project, a clear allocation of tasks will help ensure each team member is aware of their role and responsibilities. Tasks have been divided so that character design and scene set up will have an assistant through each milestone.

Milestone Alex Emiddio Ben
1 Google Dropbox

Research Alien Design

Research Project Documentation

Research Footage Types

2 Alien Design Alien Design Location Photography
3 Alien Modelling Scene Set Up Scene Set Up
4 Texturing Texturing Alien Rigging
5 Alien Integration Alien Posing Shaders & Lighting
6 Rendering Rendering Compositing

Data Management:

The project will be maintained using Google Drive where each team member will have access to all files and folders. Team members should regularly upload their updated project files to ensure an efficient workflow.

Project folders will follow a simple naming convention that categorises them into the stages of milestones required of the project. Project files will follow a standardised naming convention to ensure simple data management. As multiple people will be working on more than one area in each milestone, names will be added to monitor each team members’ work progress.

Folder Naming Convention:

Milestone#_Task

E.g. 01_Project Documentation

File Naming Convention:

Task_Name_Version#

E.g. Alien Modelling_Alex_01

Risk Management:

Risk Likelihood Impact Resolution
Team member is unable to complete tasks for any reason, e.g. sickness, personal issues. Moderate Moderate/ High Keep in touch with the team member and ensure work is distributed to others.
Loss of work due to technical issues. Moderate High Multiple back-ups, including cloud storage everyone can access.
Lack of Communication Moderate Moderate Use multiple forms of communication that everyone is active with.
Loss of Team Member Low High Speak with the supervisor.


Mood Boards:

Footage Style:

When discussing ideas about how we want our hoax photograph to look, we took into consideration aspects such as mood/tone, location, time of day and type of photograph. As we wanted our final product to look realistic and scary, we decided to have our location in a dark dense forest environment this would give an isolated and eerie atmosphere to the photograph. Our location will be the Royal Botanical Gardens. We also decided that having the time of day around daylight/dusk would allow for the alien to be seen properly, similar to the alien footage seen in Signs (2002). In terms of the type of photograph, we will be aiming towards a found footage/chance encounter shot that shocks the viewer.

Mood Board - Footage Style_Ben_01

Alien Design:

Our alien design will complement our footage style, being slender and very human-like with long limbs to give a eerie or sinister impression. We decided that this was one of the more ‘realistic’ ways to design an alien as it fits with what the general public would recognise as ‘alien’. We’ve discussed  looking at producing an interesting head design so as to make our alien look less generic, and are also considering ways to alter the limbs to prevent it being confused with a human. We will also look at the best style of skin, either shiny or more flesh-like to give the best eerie impression.

Mood Board - Alien Design_Alex_01 Mood Board - Alien Design_Emiddio_01

Project 3, Pt 1 – Project Documentation & Alien Mood Boards

WEEK 4 RESEARCH TOPIC

“When thinking about the 12 principles of animation, what is the significance of Pose to Pose and Straight Ahead animation within contemporary computer animation practices?”

In the 12 Principles of Animation, Straight Ahead and Pose to Pose refer to the methods in which animations can be produced. While Straight Ahead animation has frames produced consecutively, Pose to Pose animation has actions planned out and broken down into Keys, Extremes, Breakdowns and Inbetweens. Both methods have their own advantages, yet a combination of the two provides the best animation results.

As Straight Ahead animation is very intuitive and spontaneous, it has a greater chance to evoke a fluid movement. Meanwhile, the methodical structure of Pose to Pose makes it easier to control and plan the animation with the chance for revision before the final animation is completed. When combined, the two are able to balance out each other and produce a fluid but predictable animation.The capabilities of contemporary computer animation allow for elements of Straight Ahead animation to be incorporated over the top of Pose to Pose animation.

In terms of 2D animation, core aspects such as legs and body movements can be planned and animated in separate passes from arms, ears or capes, which may be added afterwards using Straight Ahead animation to produce a fluid movement in the end. In 3D animation, while the computer interpolates the frames between the key poses, the animator can then take control of any aspects of the animation that require attention to mimic the natural movement Straight Ahead animation.

References:

AlanBeckerTutorials. (2015, February 6). 4. Straight Ahead & Pose to Pose – 12 Principles of Animation [Video File]. Retrieved from https://www.youtube.com/watch?v=v8quCbt4C-c

Johnston, O., & Thomas, F. (1981). Disney Animation: The  Illusion of Life. New York, NY: Abbeville Press.

WEEK 4 RESEARCH TOPIC

Project 2, Pt 4 – Perspective Camera and Star Jump Loop

Correspondence:

Admittedly, there hasn’t been a lot of progress on my part since the last presentation, although this is due to my having already completed a large portion of my work. Although I have offered to take over one of my partner’s tasks in order to reduce the strain on him, at this point in time he is determined to complete his tasks. He is working hard to have them completed by the deadline. It will be decided this morning as to whether or not he believes he will be able to complete both tasks in time, with me being willing and able to step in to help finish the tasks.

Individual Progress:

Perspective Camera

The perspective camera angle has been finalised and will be used to produce a single playblast with all the animations. This will be in addition to the separate playblast for each action showing the orthogonal angles. Thanks to the generic pose my partner and I established at the beginning of the project, our animations are able to run smoothly after each other.

Currently the angle of the perspective camera may be altered to a produce a slight low shot of the character as this may be more visually appealing.

Star Jump Loop

When adding the perspective camera to the star jump animation, I realised that hadn’t produced an animation where the star jumps run consecutively without stopping in between the jump cycles. This was of course a simple fix, where the end of one cycle and the start of the next were removed to have the jumps blend into each other.

The only major amendments that had to be overcome were adjusting the pose between each jump and replicating the sense of weight being forced upon the character, and following the timing between jumps in our original video reference.

Project 2, Pt 4 – Perspective Camera and Star Jump Loop

WEEK 3 RESEARCH TOPIC

“What are some approaches to planning animation? Do you need to be good at drawing? Find some examples of thumbnail sketches.”

Research:

A major aspect of animation is creating the illusion of movement. It thus makes sense that in order to effectively create this illusion in one’s own, it’s vital to research the mechanics of how people, creatures and objects move in the real world. In many instances this will mean studying topics such as anatomy, muscle movement and the physics behind motion.

horse skeleton

horse bone segments horse body sections

Video Reference:

One of the simplest ways to plan an animation is to study reference videos, as this gives a good indication of the movement and timing that will need to be replicated.  In character animation, filming an actor performing the required actions is one of the most effective steps of planning. Other times, searching reference videos online helps you to analyse the movement of things that are dangerous or otherwise relatively inaccessible, such as the way a club hits a golf ball or how a car explodes. In these instances, it can be highly beneficial to use slow motion videos as reference as this ensures that you can see all of the minor details involved in the action.

Character reference

Car Explosion

Thumbnail Sketches:

Thumbnails are often produced while analysing video references to capture the important frames that will be transferred into the animation.  They will usually consist of a quick sketch from an orthogonal angle that effectively captures the steps in an action. These will often be accompanied by the relevant frame number from any video reference used to produce the thumbnails. It should be noted that while thumbnail sketches are not always necessary, they can play a large role in helping animators understand exactly what is moving in an action and how it is doing so. While having a high level of drawing skill is not vital in animation such as 3D, being able to produce efficient basic thumbnails is highly valued.

thumbnail

Storyboard & Animatic:­

One step further than thumbnails is the use of a storyboard or animatic. Storyboards are excellent for planning the key frames in an animation, as well as showing the visual composition of those frames. Animatics, however, tend to be more useful, as they are essentially animated storyboards that helps also help to express timing in shots and scenes.

Storyboard

up-storyboards1

Animatic

Reference:

Bayram Kurt (2014, November 28). keyframe animation video reference [Video File]. Retrieved from https://www.youtube.com/watch?v=50iirLHXX54

Goofy Thumbnails [Image]. (2007). Retrieved from http://s7.zetaboards.com/Brackenwood/topic/436179/11/

Horse Body Sections [Image]. (2012). Retrieved from http://konikfryzyjski.deviantart.com/art/Horse-anatomy-in-figures-325864318

Horse Bone Sections [Image]. (n.d.). Retrieved from http://www.thegnomonworkshop.com/store/product/867/Introduction-to-Animal-Anatomy#.ViSUKMaqpBc

Horse Skeleton [Image]. (n.d.) .Retrieved from http://www.holistic-hoof-and-horsecare.com/horse-muscles.html

StevenUniverseWiki. (2015, February 14). Steven Universe – Theme Song  Animatic [Video File]. Retrieved from https://www.youtube.com/watch?v=3ck3X9Fnmfc

The Slow Mo Guys (2013, September 16).Slow Mo Car Explosion – The Slow Mo Guys [Video File] Retrieved from https://www.youtube.com/watch?v=ZVNZqL642fY

UP Storyboards [Image]. (2009, May 29). Retrieved from http://www.theanimationblog.com/2009/05/11/up-storyboards/

WEEK 3 RESEARCH TOPIC

Project 2, Pt 3 – Splining & Camera System

Individual Progress:

Since the last presentation I’ve put a lot of effort into getting the splining for each character animation smooth and natural. I’ve still been paying considerable attention to the minor details in order to accomplish this.

Star Jump_Arms_01 Star Jump_Arms_02When converting the keys to Spline, timing issues became apparent in areas such as the arms, where they fell too fast. These were all relatively easy tweaks, analysing at the animation keys and determining best how to smooth out the tangents. In the case of the arms, all I had to do was increase the Y Translations to ease the arms into the neutral position again.

During the Star Jump, there was a notable judder in the leg as it lifted towards the body mid-jump. This issues was created as the feet (using Inverse Kinematics) strayed too far away from the hip, causing the leg to get stretched out too far. To control this I increased the height of the feet and added a slight ball roll to the foot in minor frames where necessary.

Star Jumps_Knee Wobble_01 Star Jumps_Knee Wobble_02

From the front view, there was also a very minor wobble seen in the knee as the character regained their neutral pose, which was an artefact left over from converting the animation tangents from Stepped to Splined. This was resolved by flattening out the tangents of the keys.

Star Jump_Hands_01 Star Jump_Hands_02

While not highly noticeable due to the excessive character movement, there were some tangents in the hands and fingers that needed to be adjusted to ease the curve and keep the animation fluid.

Lunge_Thumbs_01 Lunge_Thumbs_02

Similar to the animation in the hands and fingers in the Start Jump, there were a few frames in the lunge where the thumb passed through the fingers. This required a minor tweak to the curve of the tangents to delay the timing of the thumb movement to ensure that the fingers had moved pass the thumb before it rested on the fingers.

Lunge_Ball Roll on Foot Down

A slight touch that I decided to add to the animation was a light ball roll on the foot when the character’s foot comes back into the neutral pose. I felt this made the foot look less like it slapped onto the ground and more like it was easing into position, which would be a natural reflex in a real person.

Lunge_Hip Affect Arms

A minor note and nothing that I thought needed particular attention was that the hip rock causes the arms to push out in an asymmetrical way. I didn’t mind this, as adjusting the spine curve to reduce this could make the character look too stiff or controlled.

A note made by my facilitator was that the playblast might benefit from having a textured ground plane. This would mean that you can see how the feet move as there would be reference for how far the feet spread apart. I’ll have to run this by my partner to see if this would align with our vision for our final product.

Project 2, Pt 3 – Splining & Camera System

Project 2, Pt 2 – Blocking

Emmanuell and I agreed on having our character starting in a generic standing pose, having it perform its actions from this position. This means that each action will start and finish in the exact same pose, allowing us to merge all the separate animation files together seamlessly towards the end.

generic pose

Individual Progress:

Due to prior engagements for the weekend, I was unable to come onto campus to much work. That said, on Friday, I was able to produce the rough blocking for my Star Jumps character animation to make up for this.

While there are obvious points of animation in features such as the arms and legs, I feel that it’s some of the more subtle parts of the animation that make it look more natural and less mechanical. The first element would be the slight foot rock added as the feet prepare, act out and land from the jump. While this occurs, the knees point inwards

foot rock_1 foot rock_2 foot rock_3

The second element would be the way the fingers on the hands flatten out as the arms stretch into the star position. Although this in particular could be more obvious, it shows that the level of energy expressed by the character.

hand_1 hand_2

The last notable subtlety in the animation is the way the butt slightly pokes out as the character hits the star position, reflecting how force applies to the human spine upon impact and how the body accommodates for this momentum.

butt out

Generally, the feedback I received was positive, with no real areas for improvement being noted. From here on I’ll be looking at making the hand animation a bit more noticeable and looping the jump a few more times, before moving onto splining the animation.

Today I produced the rough blocking for my other character animation, the lunge. This seemed to take more key frames than the star jump, as I was trying harder to control the character’s balance and moving sections throughout the action. First to be noted should be the fact that I was able to mirror the animation in the arms via simple cut and paste of the keys, as Maya’s set up allowed for it to automatically mirror the animation.

By being able to do this, I was thus also able to mirror the animation of the right and left feet in each of the lunges. By copying the right foot animation in the first lunge, I was able to paste this onto the left foot for the second lunge, and vice versa to produce two separate lunge animations.

swapping right:left_01 swapping right:left_02

As the character steps forward and gets into their position at the middle point of their lunge, their hips rock to accommodate for the leg with the most balance. In order to balance this out, I had to gently adjust the angle of the spinal joints to the same degree so as to prevent the character from looking overbalanced on one side.

spine arc_1 spine arc_2 & knee angle

Although my research told me that the back should be straight as it enters the middle point of the lunge, people have a tendency to curve their back slightly. As I wanted the animation to look natural, I later decided to add this to the animation to further enhance the animation, make it more fluid and less mechanical.

spine arc_3

The final point of interest in the lunge animation is the knee positions as the character reaches the middle point of the lunge. Here I had the knees pointing outwards slightly, again giving the impression that the character is not mechanical. This follows the way the knees naturally shift outwards as the pelvis lowers to the ground.

From here on I’ll be looking to gather feedback on my lunge animation, and start to spline the animation. If I’m able to complete this quickly, I’ll be able to spend more time helping my partner, Emmanuell, as he’s new to 3D character animation and would likely appreciate an extra hand.

Correspondence:

As my partner is less experienced in 3D character animation, I was on call to help him out with any key questions or concerns he had. A lot of the issues he faced were to do with basic rig knowledge, so I was able to answer the majority of his questions. That said, it was difficult to communicate everything via digital message as this made it hard to understand exactly what the issue was when he wasn’t able to fully articulate what the issue was at the time. These are the types of problems that would be far easier to resolve through face to face interaction.

correspondence_1 correspondence_2 correspondence_3

Project 2, Pt 2 – Blocking

Week 2 Research Topic

“What are the most important attributes of a typical shader? What does each do, how does each work, and how would they be used to achieve a material for the surface of an old golf ball?”

Shaders in 3D modelling are used to define the surface properties of 3D objects. Shaders can range from being relatively simple to highly complex, with multiple nodes contributing to the final material. There are a range of different shaders, some of the more typical and recognisable types being;

Common Software Shaders

(Common Software Shaders, 2014)

Although these shaders produce different material effects, they all share common and important attributes;

Colour

Guard_Zombie Diffuse Map

(Guard Zombie Diffuse, n.d.)

This is arguably the most important attribute of a shader, determining the colour of the model’s surface. By default, a shader’s colour will be a solid colour, but it can have texture maps plugged into the attribute to add textures.

Transparency

Alpha Map

(Tree Alpha  Map, n.d.)

Transparency affects the visibility of the shader, defining how opaque the model appears to be. The more transparent the shader, the less opaque it will be. Alpha maps can be plugged into this attribute to cause specific areas of an object’s texture map to be transparent, e.g. in hair, windows or decals.

Reflectivity

Sphere Reflectivity

(Sphere Reflectivity, n.d.)

This allows the material to reflect elements in the scene such as lighting other objects. The reflectivity is responsible for making materials reflect elements like you would expect from shiny surfaces such as metal, plastic or glass.

Specularity

Specular Man

(Specular Man, n.d.)

The specularity determines how shiny a surface appears to be, with high specularity resulting in more highlights on the material and low specularity resulting in less to no highlights. By plugging specular maps into this attribute, it’s possible to have high specularity on key areas of a surface, while other areas do not produce any highlights.

Bump & Normal Maps

Bump Map

(Bump Map Effect, n.d.)

Normal Map

(Normal  Map Effect, n.d.)

Bump and normal maps can help to give the impression that a material has fine details modelled onto the surface, i.e. to “create the illusion of raised detail” (Russell, 2014). They give the illusion of depth to surfaces and are very useful to create effects such as fine cracks, bolts and indentations.

Although similar to each other, normal maps could be considered an improved version of the bump map. Bump maps only simulate height, meaning that if a surface is seen at the wrong angle, a bump map can lose its illusion of depth. Meanwhile, normal maps can simulate height and direction, resulting in a more realistic texture effect. (Frank Oz, 2010)

How would they be used to achieve a material for the surface of an old golf ball?

Vintage Golf Ball

(Vintage Golf Ball, n.d.)

In order to create the surface material for an old golf ball, the first step would be to create a texture map. This would be a faded cream with a yellow discolouration around the ball, featuring a logo at the centre.

To create the dimples on the surface, a normal map would give a realistic look compared to a bump map considering it will be seen from many angle. As this ball is quite scuffed, the major scratches could be added to the normal map, while smaller scratches could be added through a bump map.

Finally, low levels of specularity could be added to the inside of the dimples to show where the ball hasn’t worn down yet.

Reference:

Autodesk. (n.d.). About shading networks. Retrieved from http://download.autodesk.com/global/docs/maya2014/en_us/index.html?url=files/Asts_About_shading_networks.htm,topicNumber=d30e615884

Bump Map Effect [Image]. (n.d.) Retrieved from http://blog.digitaltutors.com/bump-normal-and-displacement-maps/

Common Software Shaders [Image]. (2014). Retrieved from http://nathanwk.blogspot.com.au/2014/07/textures-and-shaders.html

Frank Oz. (2010, October 13). Re: Normal Map vs.Bump Map [Online Forum Comment]. Retrieved from http://forum.unity3d.com/threads/normal-map-vs-bump-map.78622/

Gooding, L., & Lammers, J. (2003). Maya 4.5 Materials. Retrieved from http://www.peachpit.com/articles/article.aspx?p=31330&seqNum=3

Guard Zombie Diffuse Map [Image]. (n.d.) Retrieved from http://s1057.photobucket.com/user/woo_art_77/media/Guard%20Zombie/Guard_Zombie-Lv2-DIF.jpg.html

Normal Map Effect [Image]. (n.d.) Retrieved from http://blog.digitaltutors.com/bump-normal-and-displacement-maps/

Russell, E. (2014). Eliminate Texture Confusion: Bump, Normal and Displacement Maps. Retrieved from http://blog.digitaltutors.com/bump-normal-and-displacement-maps/

Slick, J. (n.d.). Surfacing 101 – Shading Networks and Surface Materials. Retrieved from  http://3d.about.com/od/Creating-3D-The-CG-Pipeline/a/Surfacing-101-Shading-Networks-And-Surface-Materials.htm

Specular Man [Image]. (n.d.). Retrieved from http://cgterminal.com/2011/09/19/maya-render-layers-diffuse-and-specular-tutorial/

Sphere Reflectivity [Image]. (n.d.) Retrieved from http://www.3drender.co.uk/faqs/?v=6cc98ba2045f

Tree Alpha Map [Image]. (n.d.). Retrieved from http://www.3drender.co.uk/faqs/?v=6cc98ba2045f

Wilkie-King, N. (2014). textures and shaders. Retrieved from http://nathanwk.blogspot.com.au/2014/07/textures-and-shaders.html

3D Tutorial Zone. (n.d.) How Shaders Work In Maya. Retrieved from http://www.3dtutorialzone.com/tutorial?id=107

Week 2 Research Topic